
So this is pretty exciting. If you’ve ever used the old Google sites you’ll understand how overdue this really is. Welcome to the NEW Google Sites!
If you prefer video tutorials, check out this great 16+ minute overview.
- How to Access
- Creating your first website
- Changing your theme
- Inserting Text
- Inserting Images
- Inserting content from your Google Drive
- Embedding Videos, Calendars, and Maps
- Previewing your Site
- Adding a Page to your site
- Sharing your website
How to Access
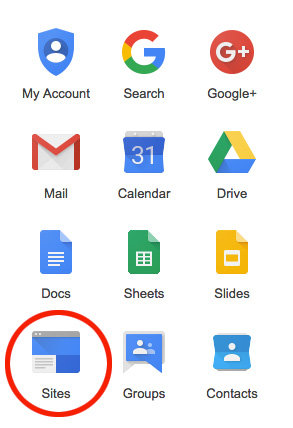 Accessing the new Google Sites is the same as the older version… just click the
 ![]() symbol from a new tab or within your Google Drive and look for the Sites as pictured here.
symbol from a new tab or within your Google Drive and look for the Sites as pictured here.
If you don’t see it you may need to click more and find it that way. Alternatively, you could visit https://sites.google.com/ and access the same thing this way.
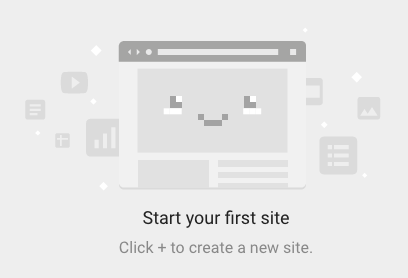 Once you’re in, you’ll probably see this image/message.
Click the  icon in lower right and you’re on your way to creating a new Google Sites!
Creating your first website
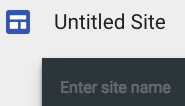 The first thing you’ll want to do, like you would in any document, is to give it a name. Renaming these is point-and-click, and naming either the “Untitled Site” or “Enter site name” seen here names both the same name (i.e. Ms. Robert’s Fantastic First Graders)

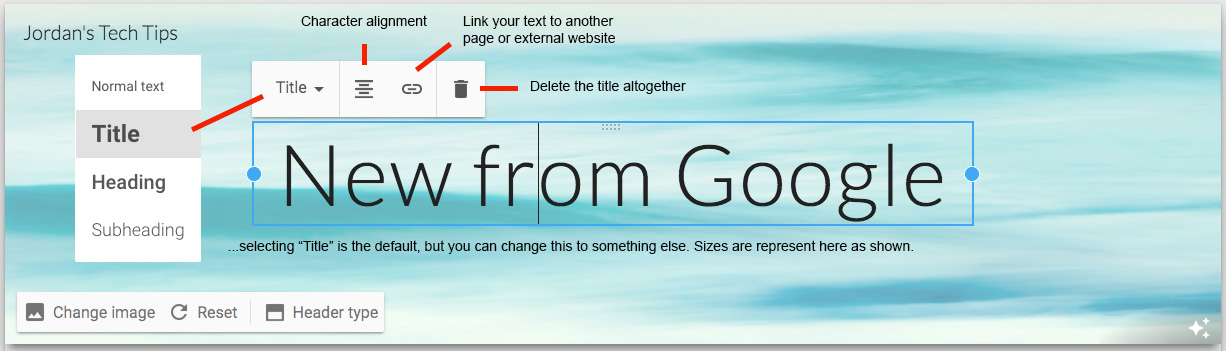
The rather large page title can be changed the same way, by simply clicking on it. When you hover your page title, notice the blue border. This blue border will allow you to stretch “handles” so if you have a longer title you could make it fit on one line.
 Don’t like the background? Select Change Image and select from Google’s gallery of images or upload your own. Just like Google Forms, the size of this is pre-determined and will be cropped.
If you’d like to have your image displayed even larger (vertically) you can select “Large banner” inside the Header type options, or “Title only” to remove an image altogether.
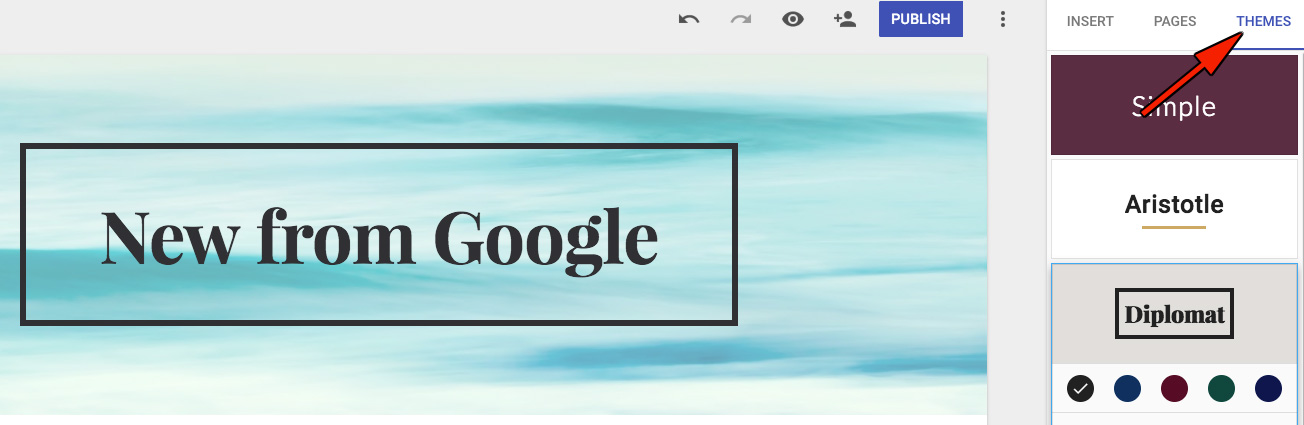
Changing your theme
Google Sites makes it really easy to change your theme. If you notice the last “tab” on the popout to your right you will see Themes. For this example I chose Diplomat. Notice too you can change colors as well (although each theme does have their restricted fonts and colors).
Inserting text
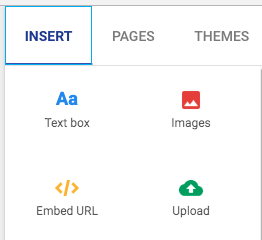
Getting back to that same popout menu on your right, head back over to the Insert category.
We will begin this section with Text box.
Selecting this automatically adds a textbox below your page title header, as shown below.
Further clicking of text boxes will keep adding them below the first one you created, with the option of moving them above or below each other. Look for this icon ![]() when hovering over text…
when hovering over text…

 As you can see from screenshot above, similar type-editing tools are present just as you would expect from Google Docs or any of their other apps (i.e. bold, italics, alignment, etc).
There are those blue handles, as I’ve mentioned earlier for page titles, are available as well. Unfortunately at this time, however, there is no way to add more than one column for text boxes 🙁
To make columns:
First, make a text box wherever you like. This will create a full-width text box but we’re going to change this soon.

Then shrink the text to the size of the column you want. This is easily adjustable at any point.

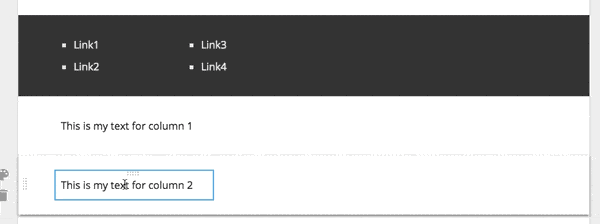
After you drag your text-box into a smaller column size, you’ll see it look similar to this below.

Second, create another row of text below this. Just repeat the first step. You’ll see it appear below the resized column you just made.

Now repeat the dragging you did for the first column. I used the guides while dragging so everything lined up perfectly. Screenshot below shows column 1 handles but this is just I could get a better screenshot 🙂 In reality, you’ll have just re-sized column 2.
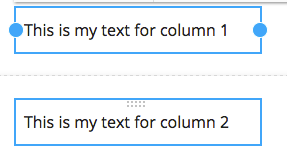
For the Third and final step you’ll just want to drag the “column 2” you created to the right of column 1.
Moving onto colors. Clicking the ![]() will allow you to change your text-background color, which is pretty cool. The default is Regular which is no background at all but this can be changed.
will allow you to change your text-background color, which is pretty cool. The default is Regular which is no background at all but this can be changed.
Inserting Images
If you’re still frustrated by the thought of not being able to add columns of text (you can do this in Google Docs now… finally… so maybe this will change here in Sites) please note that you can do other things to offset your anger, like add an image instead.
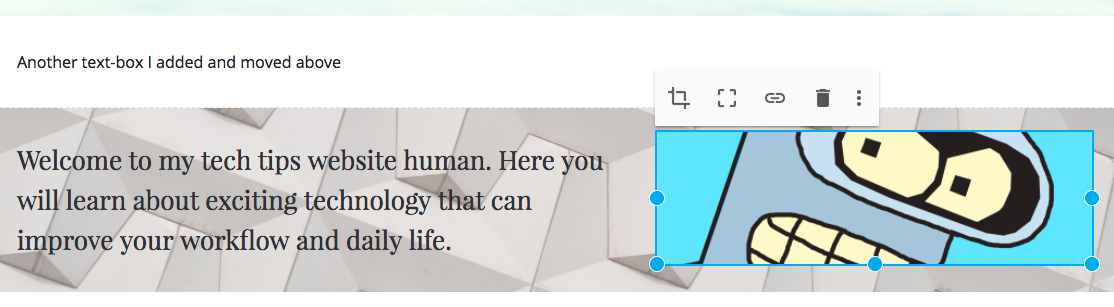
Google makes it really simple to move images around. You can’t really tell from my screenshots but I was able to crop, scale, and move Bender the robot around without any hassle.
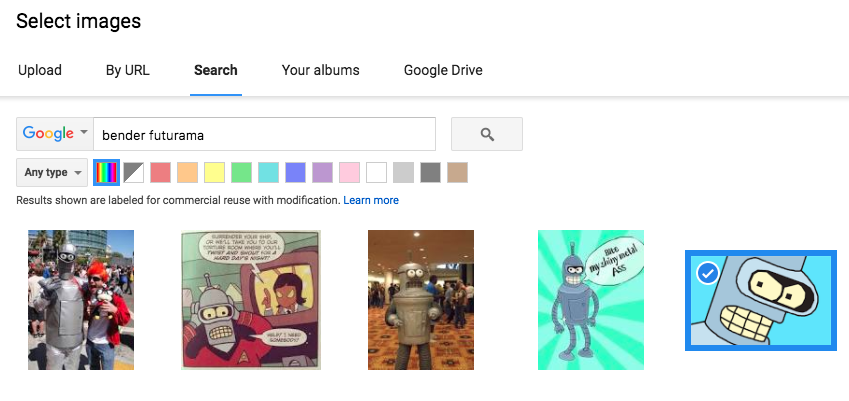
How did I find this image you may be asking yourself? Well, it’s built into Google’s search.
Steps to add an image:
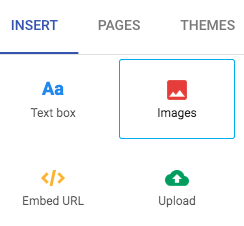 1) Go to the Insert category and select Images.
2) Click Search and insert your search. Then click Select.
Inserting content from your Google Drive
Perhaps the most exciting thing to talk about here is the ability to add files and even entire folders to your Google Sites.
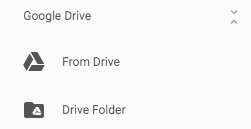 Looking to your popout section again, you’ll see Google Drive right there to use. I’ll try and explain this in the most straightforward way possible: Selecting From Drive will give you a mini-browser in the same window where you can insert files from your Drive. If you insert something like a Google Sheets, Docs, Slides, etc, it will embed (place it within the site) that particular file as shown (for example).
Notice, again, the blue handles. If I were to stretch this spreadsheet the user would then need to scroll. The adaptability of this method will look good in any format, such as a tablet or smartphone.
The ![]() icon indicates that when a user clicks your Google Doc it will open in a new window.
icon indicates that when a user clicks your Google Doc it will open in a new window.
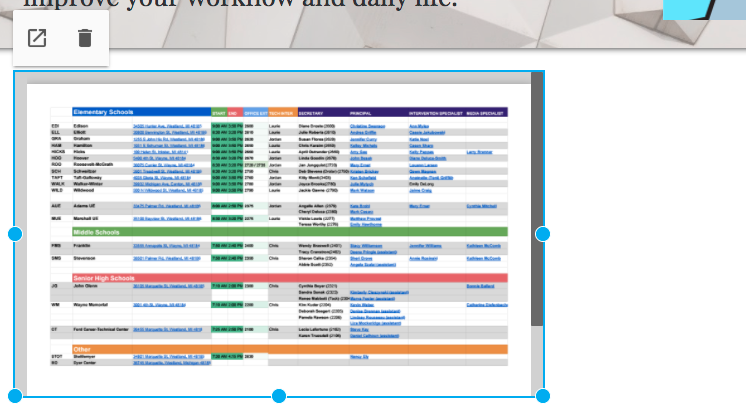
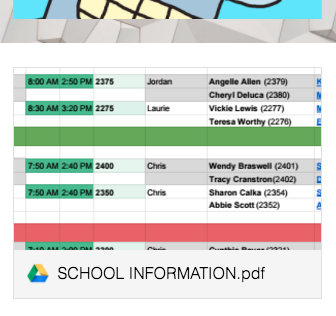
I realize this Google Sheets isn’t exactly…readable. However, every one of these links would work and users could pop out each file you attach with the ![]() icon as shown below. See the following examples for a preview of this file on a computer and smartphone.
icon as shown below. See the following examples for a preview of this file on a computer and smartphone.

On a browser
On a smartphone (scaled for vertical viewing automatically)
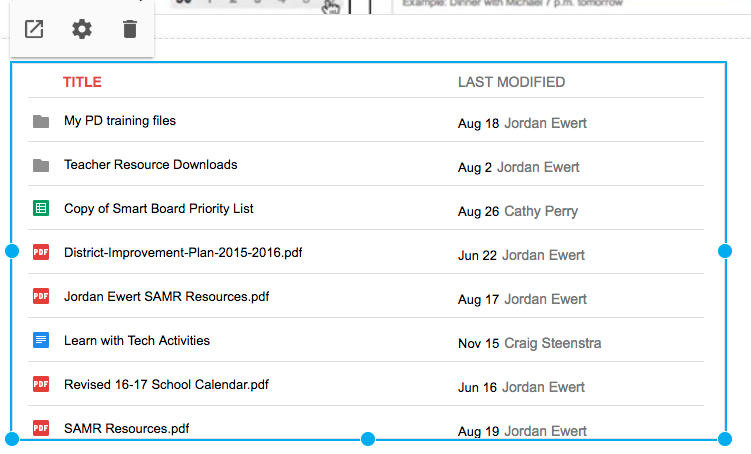
 Alternatively, you could place a recent Google Apps file (sheets, docs, slides, etc) from the Google Docs section.
This browses your most recent files within whatever category you select. You can select more than one file at a time just by selecting multiple documents (no need to shift+click).
As you can see, each time you add a new document it stacks itself beneath your previous file. You can always re-arrange these, scale them, etc later on.
Now, onto Drive Folders. When you insert a folder, Google Sites will give you a way to have your students access any folder or file inside of it. Of course, any updates you make will be automatically updated!
Notice the gear icon now. This allows you to have your folder viewed as a list (shown above) or as icons. This works the exact same way you’d expect it to and looks like it would when changing the view in your own Drive.
Embedding Videos, Calendars, and Maps
Embedding YouTube videos, Google Calendars, or Maps is simple.
YouTube

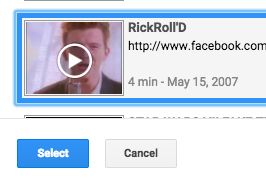 Inserting a video works only from YouTube (because Google owns YouTube I reckon). Just click the YouTube option, do a search, and you’re all set. Go ahead… Don’t say I didn’t warn you.
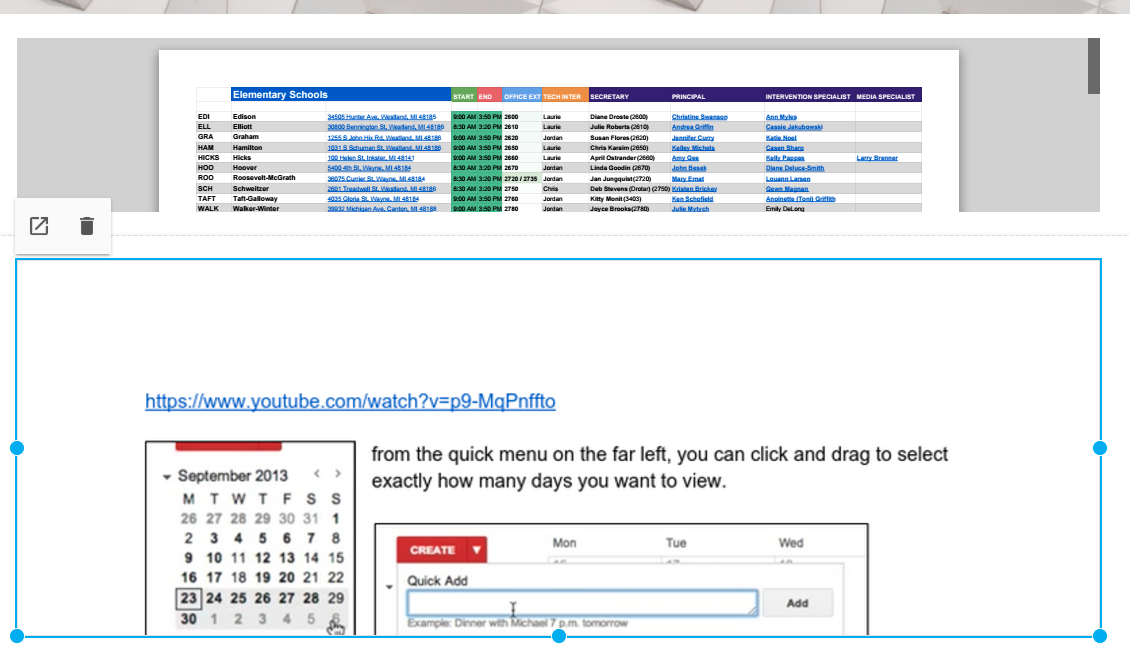
Inserting your Calendars is easy, too. Note: You will only be able to insert calendars you own or have access to.
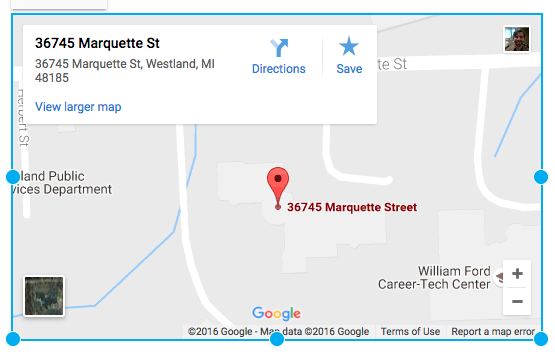 Finally, Maps works through Google’s interface so all you really need to do is get the address and let Google take care of the heavy lifting.
Previewing Your Site
 When you’re ready to see how your site looks with the preview icon above. This works just like it does in Google Forms if you’re familiar with that.
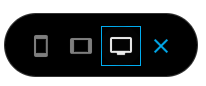 What I like about this the best though, is your ability to preview your site on a computer, tablet, or smartphone. When you’re done click the “X”.
Adding a Page to your site
![]() Getting back to where we started, the popout menu. Notice the Pages section. To add a new page click this icon.
Getting back to where we started, the popout menu. Notice the Pages section. To add a new page click this icon.
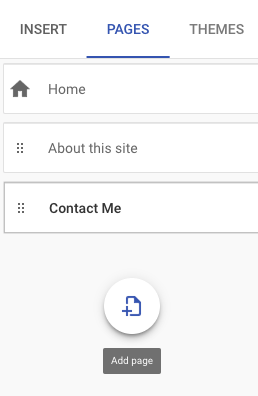 When you add pages you will be able to move them in whatever order you like with the
 ![]() icon.
icon.
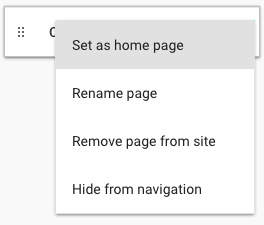
You can change your home page if you like, rename it, or remove it completely from the site or just navigation.
 Here is what these pages look like in the navigation… these appear on the right-hand side of your website on a computer.
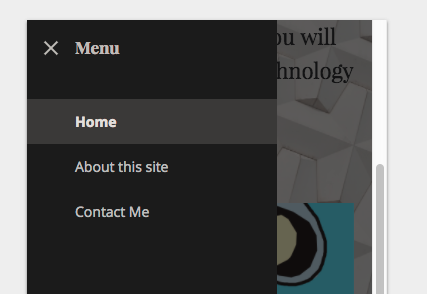 Here is what they look like on a smartphone.
Sharing your website
![]() Think you’re ready to share your website? Well you can do that with the Publish icon.
Think you’re ready to share your website? Well you can do that with the Publish icon.
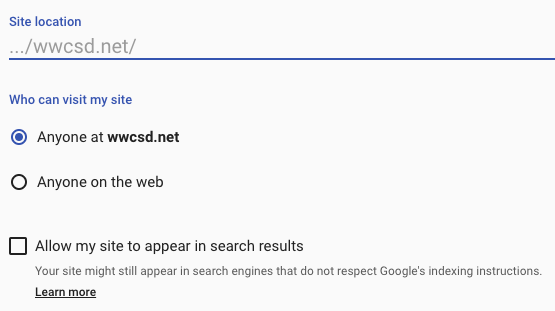
![]() These are the default settings, as shown above. I typed in “jordan-tech” and here is what it looks like in a browser. If I were to click Anyone on the web it would be public. If I were to select Allow my site to appear in search results your site would be found in Google in a matter of days.
These are the default settings, as shown above. I typed in “jordan-tech” and here is what it looks like in a browser. If I were to click Anyone on the web it would be public. If I were to select Allow my site to appear in search results your site would be found in Google in a matter of days.
 The last thing I’ll cover in this tutorial is the SHARING options, which you can access by clicking this icon. Notice it’s designed for editors.
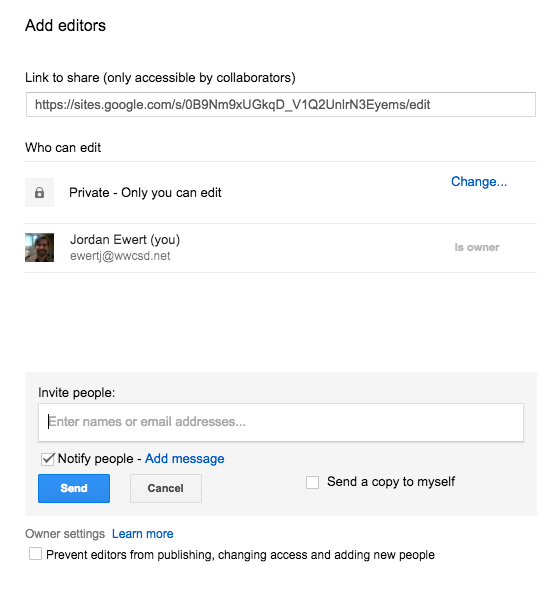
This is important, when you’re sharing your site with people you want to also edit your website keep in mind that, as the owner of the site, you can prevent your additional editors from publishing, changing access and adding new people. See last option in screenshot above.
I hope you’ve enjoyed this tutorial and are ready to get started!
You must be logged in to post a comment.