
Scanning to your email can be very helpful in a classroom setting.
Here are some of the possibilities:
- Scan worksheets to a digital format to be used on the Smartboard
- Create digital copies of previous pdfs
- Scan your test bubble sheets and put them into Mistar DNA instead of using the webcam (Illuminate)
In our district, we have large copiers in the staff break rooms that allow the staff to make copies but they can also scan and send information to our emails via the fax/scan feature. (The following pictures are an example from one of our copiers; most of the ones in district are very similar.)
- Sign in to the copier
- Choose the Fax/Scan button (Pic 1)
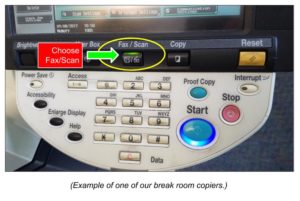
Pic 1
- Choose email (you may have to click on the blank email box to enter your email) (Pic 2 and Pic 3)
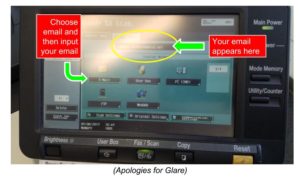
Pic 2
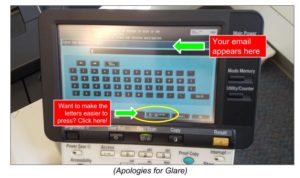
Pic 3
- Check that your email appears correctly in the menu
- Put your documents in the paper feed (as you might to make a copy)
- Press “Start” and the documents will be sent to your email
Note: Your scans will be named something similar to “Message from {Building Code}_KMBT_{Model of Printer}”. This is good to know if you are scanning multiple files; you can rename the files at a later time. It will also come as a non-editable file (example.jpg or .pdf).
You must be logged in to post a comment.