Google Forms are a powerful part of the Google Suites, or G-Suite as they now call it. Forms allows you to create on-the-fly questions with a variety of answering formats that can easily be shared, emailed, or embedded into a webpage.
What can you do with Forms?
Manage event registrations, whip up a quick opinion poll, collect email addresses for a newsletter, create a pop quiz, and much more.
You can create and analyze surveys right in your web browser—no special software is required. Even better, multiple people can work at the same time, and every change is saved automatically.
Index
- Getting to Google Forms
- Creating a new form / designing template
- Adding questions
- Editing questions
- Advanced form options
- Create a form that’s a quiz
- Share / collaborate your form or quiz
- Choose where to collect responses
1. Getting to Google Forms
 First of all, make sure you’re signed into Google Apps!
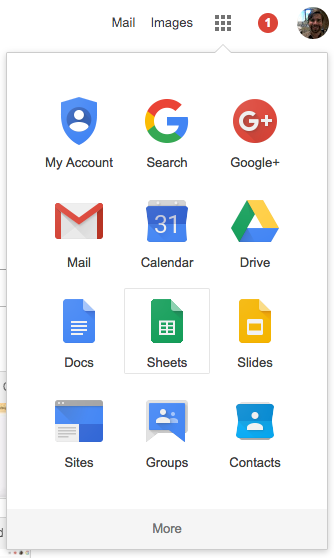 Now that you’re signed in, click the
 ![]() (waffle icon) to get to Google Forms.
(waffle icon) to get to Google Forms.
![]()
Not listed? Click the More option.

This is what we’re looking for.
*Google Classroom is most likely located in this more section as well…
2. Creating a New Form / Designing your Template
From your Forms homepage: Click Create new form ![]()

At the time of this writing, you can create a form using a template, such as Blank, Exit Ticket, Blank Quiz, Assessment, or Worksheet. The forms homepage (link above) you see when first launching Forms will show your most recent forms.

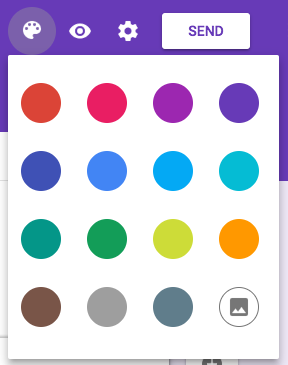 Google is all about colors, as I’m sure you’ve noticed. By default, choosing a blank form will look most likely like this above purple scheme. If you want to change the colors or add an image background this can be done very quickly.
Change the color of header: Select the ![]() icon and choose your color. Select. Done.
icon and choose your color. Select. Done.
 Set an image background, select the
  icon and either a) select one of Google’s backgrounds or b) upload your own image. Keep in mind you’ll have to crop the image to Forms preset ratio.
One final note on design… The color of your form background itself (not the header) will adjust itself depending on the average color of your image or color selection.
3. Adding Questions to your Form
![]() Before adding questions to your form, let’s give it a name. Look towards the upper left of your screen and click where it says “Untitled Form” and change it to be what it needs to be instead.
Before adding questions to your form, let’s give it a name. Look towards the upper left of your screen and click where it says “Untitled Form” and change it to be what it needs to be instead.
You’re ready to get started, so let’s create our first question.
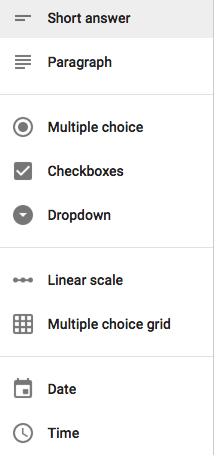
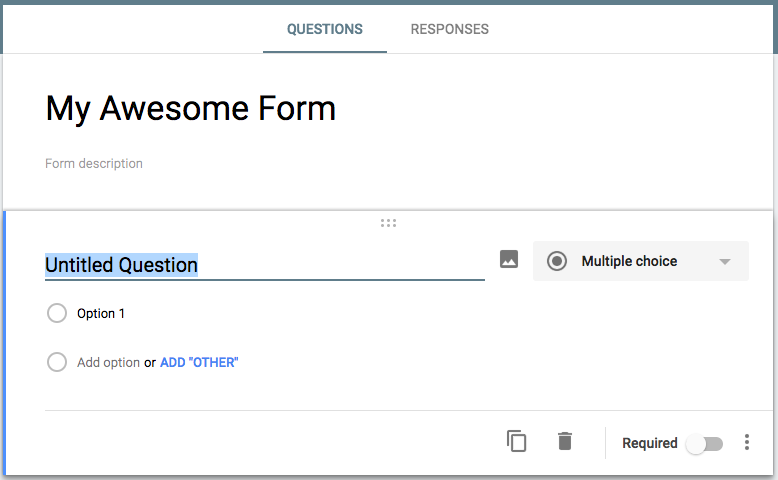
Now just name your question and select the kind of answer you want.
The default question type is multiple choice, as pictured above. However, you can pick any of these instead. Check out this chart below for the details.
| Short answer | Type short answers. Ex: Name |
| Paragraph | Type longer answers. Ex: What’s one thing that can be improved in this course? |
| Multiple choice | Select one of several options. Ex: Which course did you take? |
| Checkboxes | Select as many options as they like. Ex: How did you hear about our organization? Select all that apply. |
| Dropdown | Select one option from a drop-down menu. Ex: Select your department. |
| Linear scale | Rate options on a numerical scale.
|
| Multiple choice grid | Select a point from a two-dimensional grid.
|
| Date | Select a date from a calendar picker. Ex: When did you attend our conference? |
| Time | Select a time (either a time of day or a duration of time). Ex: What is the best time to contact you? |
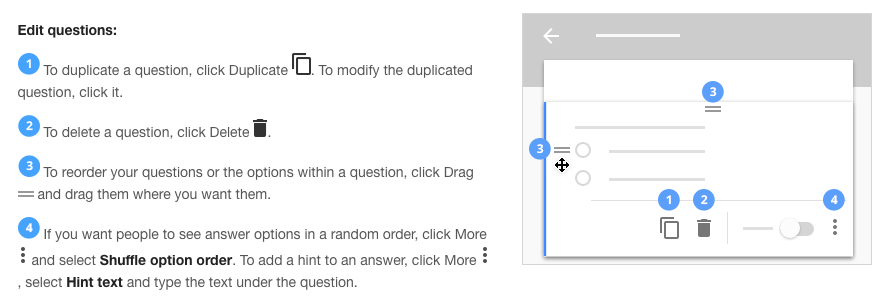
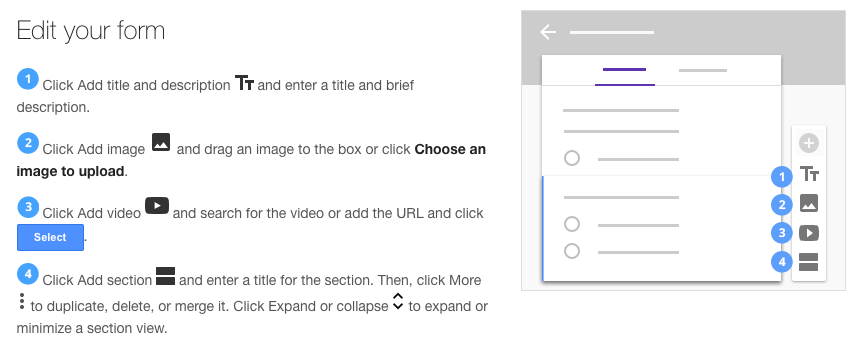
4. Editing the questions on your form
5. Advanced question options
![]()
Slide this to make your question required. Users will see a red asterisks * and will not be able to submit their form until that question is answered.
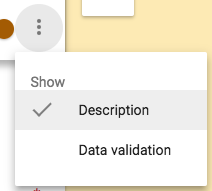 Clicking the three dots
 ![]() will give you some additional options. One of these is description which can be really useful when clarifying what a question is asking.
will give you some additional options. One of these is description which can be really useful when clarifying what a question is asking.
6. Create a Form that’s a Quiz
The easiest way to make a quiz is to go to your forms homescreen and select “Blank quiz.”
If you’ve already made a form you can convert it to a quiz by following these steps below.
- Open your form
- At the top right, click Settings

- Click QUIZZES.
- Next to “Make this a quiz” click the switch

- Click SAVE.
Choose correct answers
Assign points to questions
You can make an answer key for all types of questions, except for grid questions.
- To add a new question, click Add

- Fill out your question and answers.
- In the bottom left, click ANSWER KEY.
- In the top right of the question, choose how many points the question is worth.
Note: To go back and edit the question or options, in the bottom left, click EDIT QUESTION.
See quiz responses
You can see automatic summaries of all the responses to a quiz, including:
- Frequently missed questions
- Graphs marked with correct answers
- Average, median, and range of scores
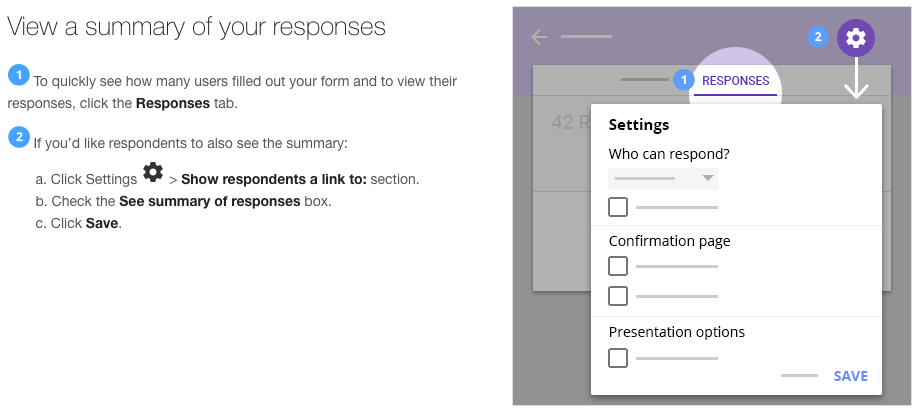
See a summary of your responses
- Open a quiz in Google Forms.
- At the top, click RESPONSES.
- Click SUMMARY.
Note: To look at individual responses, click INDIVIDUAL.
Choose what people see after they submit
You can choose what people can see during and after they submit their answers:
- Missed questions
- Correct answers
- Point values
To change options:
- Open a quiz in Google Forms.
- At the top right, click Settings
.
- Click QUIZZES.
- Under “Respondent can see,” check the boxes next to the options you want.
Send Results via email
Step 1: Collect email addresses
- Open a quiz in Google Forms.
- At the top right, click Settings
.
- Under “GENERAL,” check the box next to “Collect email address.”
Step 2: Choose when to release grades
- At the top right, click Settings
.
- Click QUIZZES.
- Choose an option:
- Immediately after each submission: Choose this option if you want people to get their results right away. They will click “View scores” after they submit their answers.
- Later, after manual review: Choose this option if you want to email results to respondents.
Step 3: Email results
There are two ways to send email scores to respondents from “RESPONSES” in your form:
Use SUMMARY
- Click SUMMARY.
- Scroll down until you see “Scores.”
- Click RELEASE SCORES.
- Check the boxes next to who you want to email.
- Click SEND EMAILS AND RELEASE.
Use INDIVIDUAL
- Click INDIVIDUAL.
- At the top right, click RELEASE SCORE.
- Check the boxes next to who you want to email.
- Click SEND EMAILS AND RELEASE.
Grade Individual Responses
If you collect email addresses, you can assign points and leave feedback on individual responses to send later. After you grade a response, be sure to save your changes.
- Open a form in Google Forms.
- At the top, click RESPONSES.
- Click INDIVIDUAL.
- To move between responses, click Previous
or Next
.
- Find the question you want to grade.
- In the top right, enter how many points the response earned.
- Under the answer, click Add individual feedback.
- Enter your feedback and click SAVE.
- To save your changes, click SAVE.
- When you’re ready, you can email scores to individuals.
7. Share and collaborate
Sharing your form for collaboration purposes
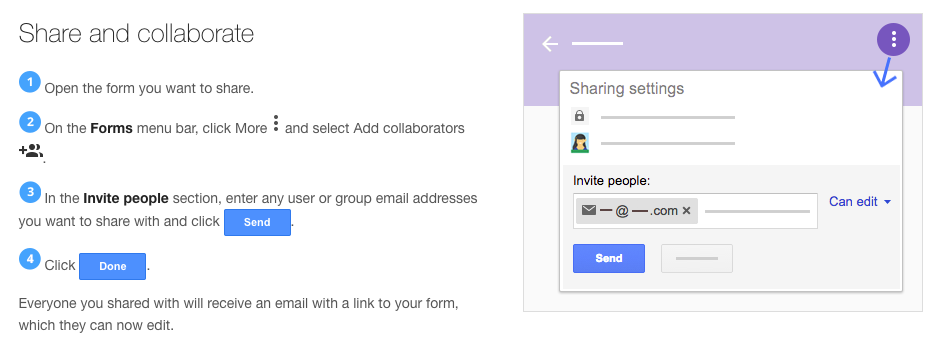
To work on your form with WWCSD staff all you need to do is share your form (or quiz). As with any Google document, people can make changes at the same time, and you’ll see their changes after they happen.
When you’re done editing your form, it’s time to start gathering some answers.
Here is how to share the Form so it can be filled out.

Click the SEND button to get the following screen.
To see how your form will look to others, click Preview ![]()
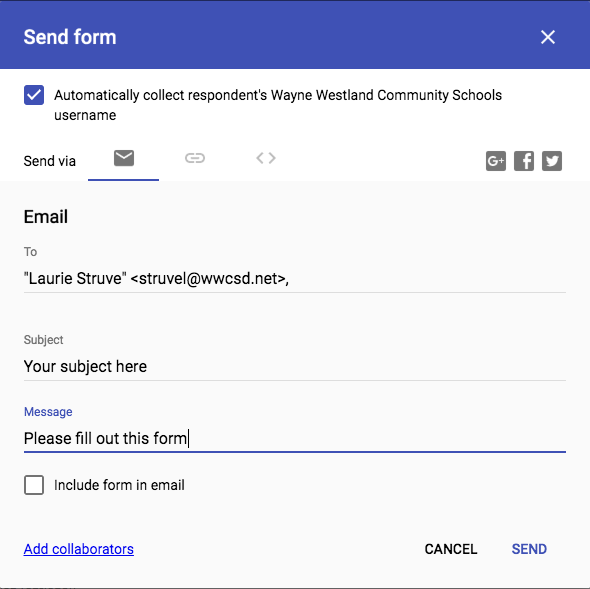 The default send option is to send the form vial email (or a group of emails).
As pictured here, you can send the form (as a link that will open in its own window) to specific emails with your subject and message.
Alternatively, you can also check the Include form in email and you’ll be able to basically embed the form inside the email instead of the link option.
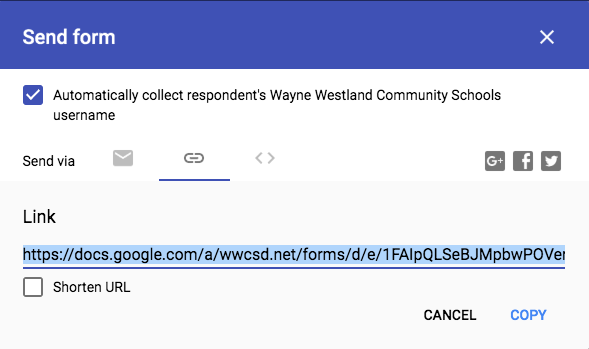
Another option for sending your form is by a link, which is almost the same method as the example above. This is useful especially if you have a mail list that’s not incorporated in Google… so this method can save you time in that regard.
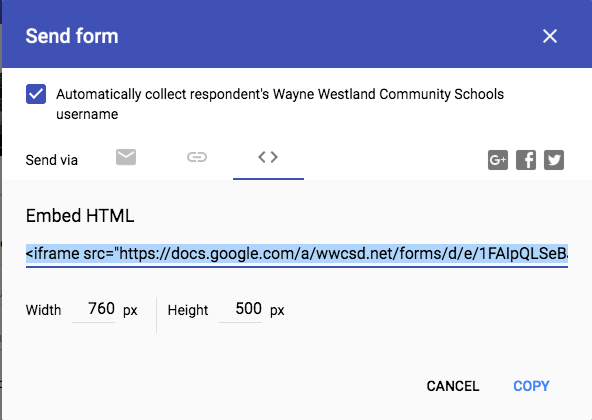
Finally, you can embed the form inside of an HTML web-page. If you want to have this form placed on a website, or your blog, this would be the option to go with.
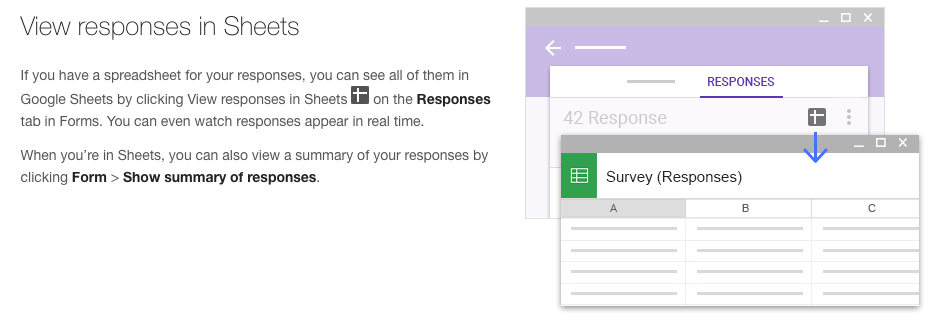
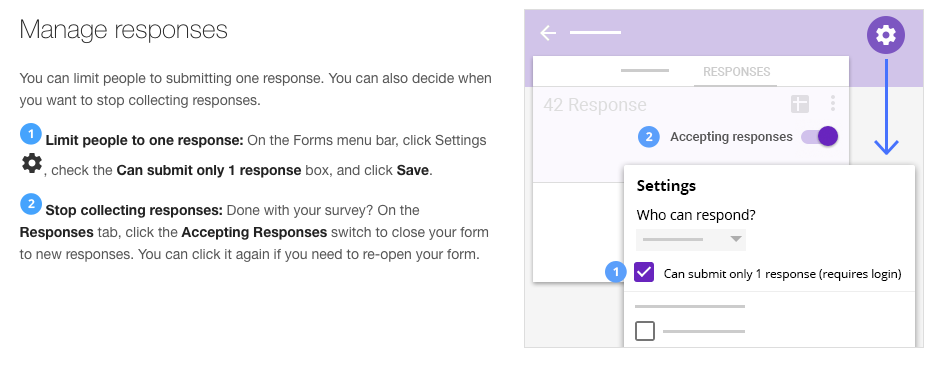
Choose where to collect responses

To get response email notifications, you’ll need to add the extension Form Notifier (see this tutorial which explains more)



You must be logged in to post a comment.