
Google Drawings is a great way to create different worksheets, notebooks or layered images in a document. It allows the user to layer images, create word art, and arrange objects.
Some interesting things to note:
- Google Drawings is its own program; Google Docs has an option to add a drawing with many of the same features
- To add a Google Drawing (created in Drawing) to a Doc, click edit and choose the Web Clipboard. Choose Copy the entire drawing. Open Docs, reopen the web clipboard (as in Drawings) and then choose the Drawing instead of copy.
Classroom Applications:
- Create Newsletters with a banner and text boxes
- Create thinking maps that students can fill in
- Share a copy of a thinking map with each student and let them drag text from a word bank
Check out Google Drawings!
Using Google Drawings in the Classroom:
Open Google Drawings.
- Give your document a name. (All documents start as “Untitled Document”)
- Add your components:
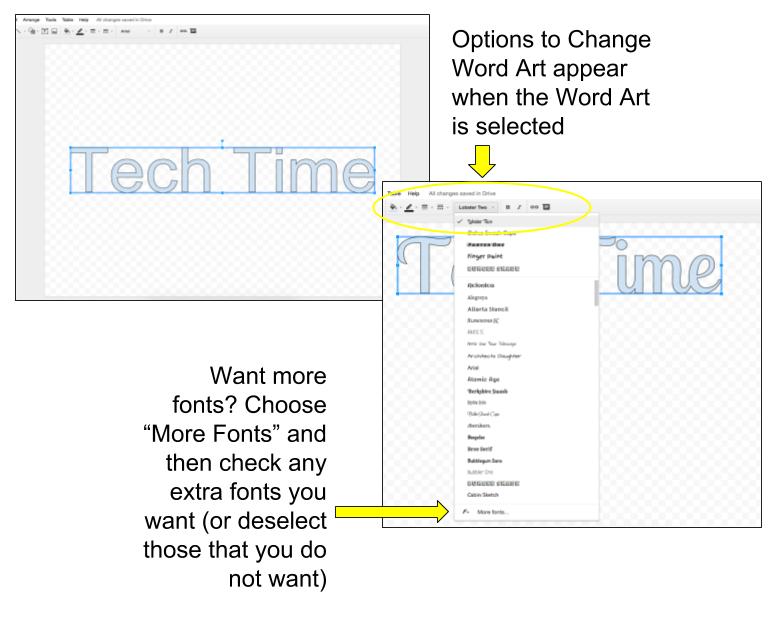
- Word Art: Go to “Insert” and choose “Word Art”. Type what your words and then hit enter. You can also alter the text like you would in a document.
Click to Enlarge
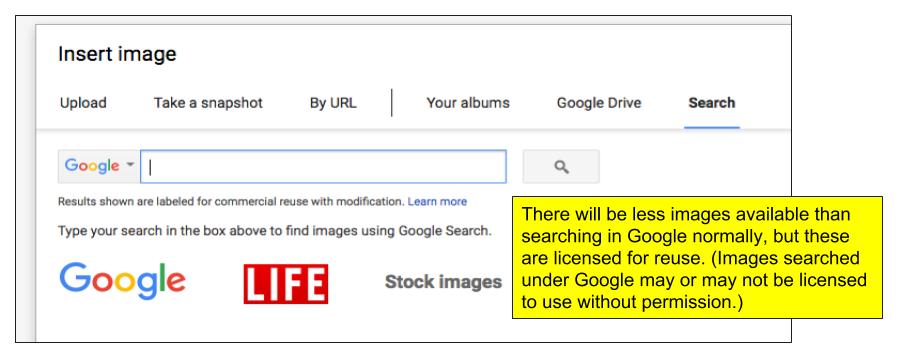
- Images: Click “Insert” then “image” or the button on the toolbar. A window will open and will offer many choices such as uploading an image from your computer, your Google Drive, or Search for an image.
Click to Enlarge
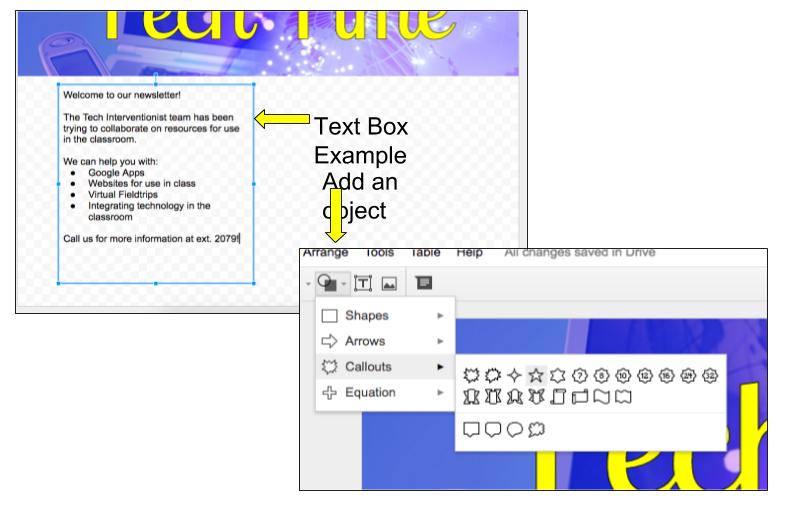
- Text Boxes: Click “Insert” then “Text box” or click the T button on the toolbar. Type your text. You can move this text box anywhere in the document.
- Shapes: Click “Insert” then “Objects” until you find the object you want. Google has premade shapes (arrows, stars, etc) that you can add to your document.
Click to Enlarge
- Word Art: Go to “Insert” and choose “Word Art”. Type what your words and then hit enter. You can also alter the text like you would in a document.
- 3. Altering Components:
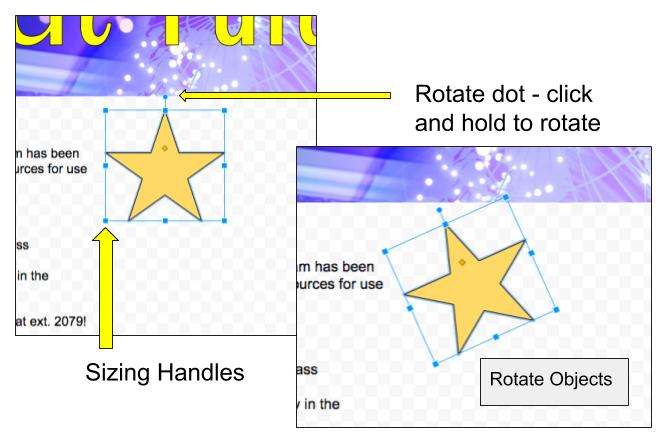
- Size: Choose one of the sizing dots around the perimeter of the object and hold it until you reach the desired size.
- Crop: Choose the crop button from the top and these black dashed line will replace the sizing dots. Move the cropping edges until your image looks the way you want. Then click the crop button on the top to make the changes. Note: the faded parts of your image will not appear once cropped.
- Rotation: There are two different ways to do this. Either right-click and choose “Rotate” and pick the standard rotation you would like to use or click the dot above the object and drag it to rotate it.
Click to Enlarge
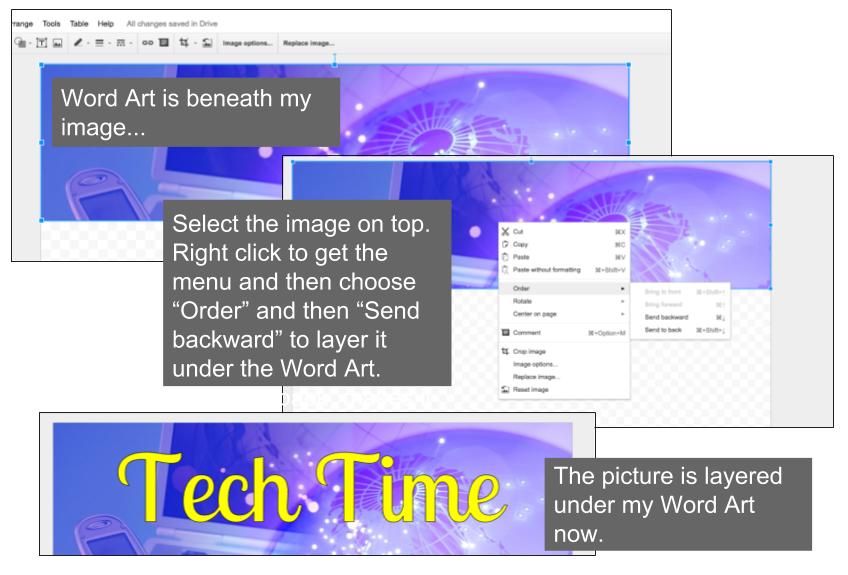
- Order of objects: This is talking about how images are layered. When you are moving the order, you are putting a component under or over another layer. For example: The word art was added first, so it’s the bottom layer. The purple technology picture was added second, so it’s layer is covering the word art. If you want to change it so that the word art is on top of the picture you need to choose to either put the purple picture “back” or bring the word art to the “front”.
Click to Enlarge
4. Put the image in a document or presentation: To add your drawing to a document you need to click on “edit” and then “web clipboard”. It will give you the option to “Copy the drawing to the web clipboard.” Then go to your document and “Paste” it in the Google Document you would like to see your drawing!
5. In Google Docs you can also create a Drawing within your document (similar to all the layered screenshots in this document)
Other Activities to Create with Google Drawings:

Click to Enlarge
You must be logged in to post a comment.