
Google Maps has come out with some amazing features that can be used to enhance instruction in the classroom. (No, it’s not just for directions!) With the Street view option it allows students to take to the streets and view the world around them. Google has also integrated Google Earth and 3D renderings of their maps which helps intensify the almost 360 degree perspective.
Some Ideas on How to Use it in the Classroom:
- Create a “Scavenger Hunt” (Find the Absolute and Relative location of a list of places)
- Explore the Street view to see Landmarks for Social Studies or search landforms to explain what the rainforest looks like or explain erosion from inside the Grand Canyon
- Let your students explore perspective (how a landmark appears to the surrounding area)
Let’s explore Google Maps!
Using Google Maps in the Classroom
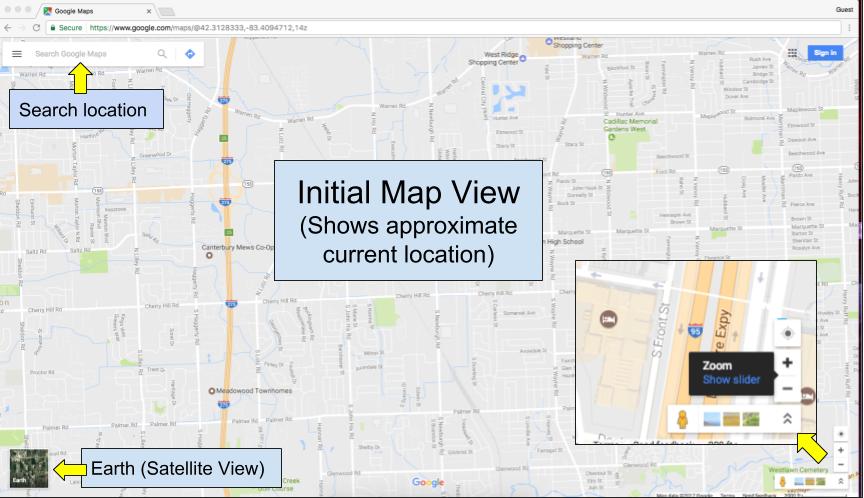
- Open Google Maps (maps.google.com)
Click to Enlarge Image
- Choose the place you would like to explore.
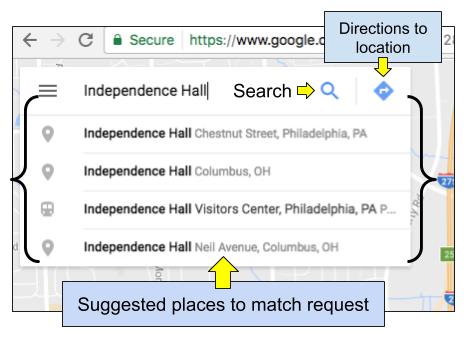
- Types of Searches used in Maps:
- Specific Name (and Google will make suggestions of the rest)
- Specific Location (Latitude and Longitude – the more specific the better)
- Relative location (aka “Forts near Detroit, Mi”)
- If you are looking for Latitude and Longitude, https://itouchmap.com/latlong.html is relatively easy to use to find specific places with similar search parameters as Google (it also integrates Maps!)
Click to Enlarge Image
- Types of Searches used in Maps:
- Google should zoom into your specified location and present a quantity of information:

Click to Enlarge Image
-
- Left Sidebar menu – This gives some basic info of the location selected including any website, hours, photos, videos, or ratings information. Click on any of this to expand any of the information. (If you are signed in, you can also save your location by clicking on the star under the location name.)
- Map – Should show the location with a red arrow identifying it.
Click to Enlarge Image
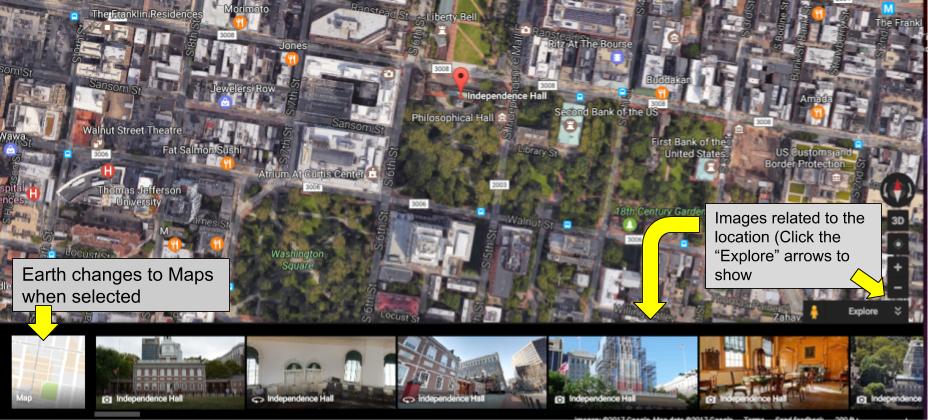
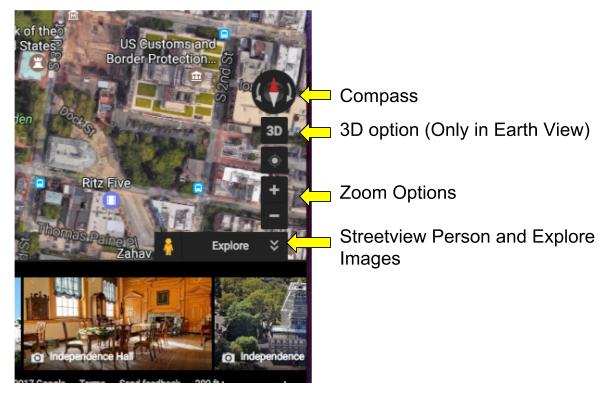
- Google Earth Option – Change the view from a traditional map to a satellite image.
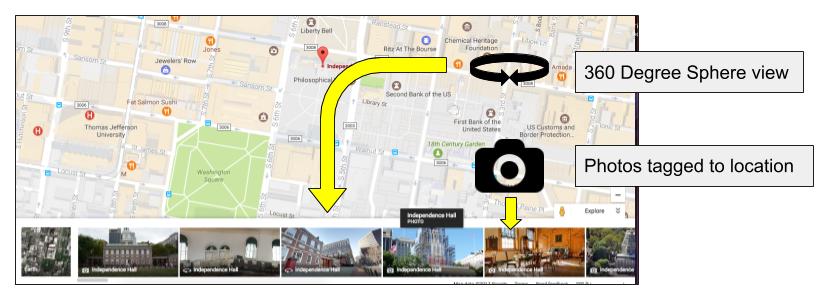
- Image Toolbar – This will show images tagged to the location including user submitted 360 degree sphere views
Click to Enlarge Image
-
Click to Enlarge Image
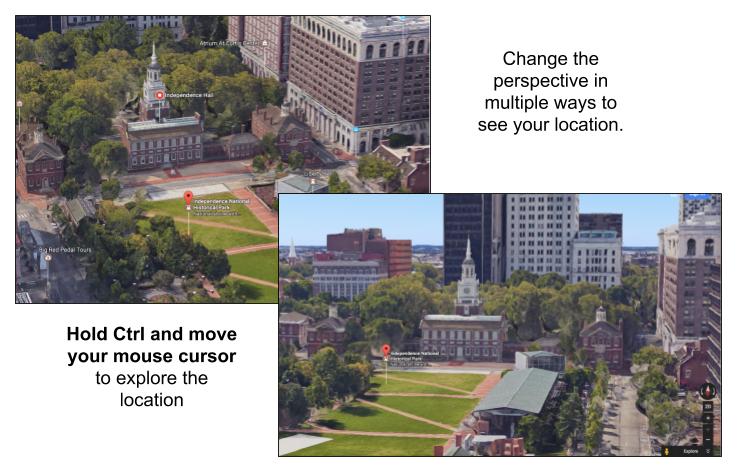
3D View – Drag the mouse around to see the location in 3D. (You must be on the Earth map.) Hold Ctrl and drag the mouse to change perspective relative to your location.
Click to Enlarge Image
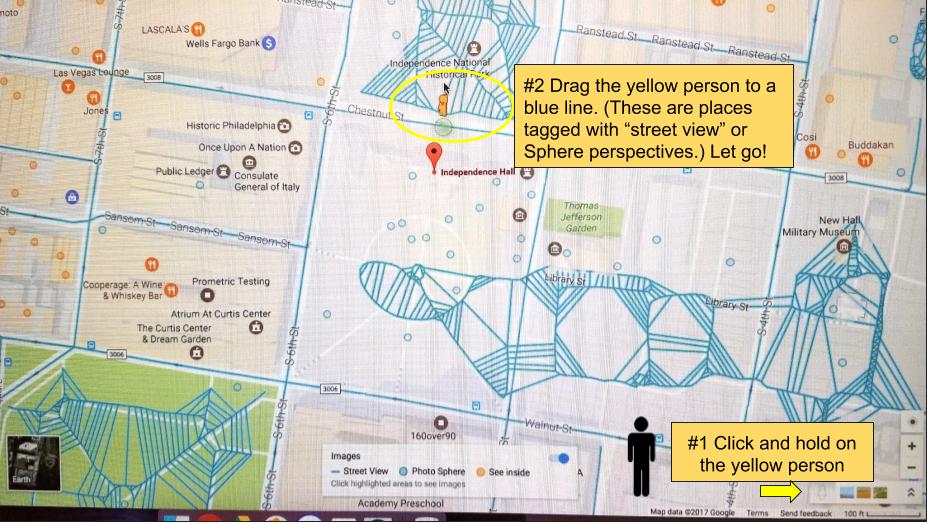
- Street view – Explore from the street! Drag the little yellow guy to a bright blue location to explore around you.
Click to Enlarge Image
-
-
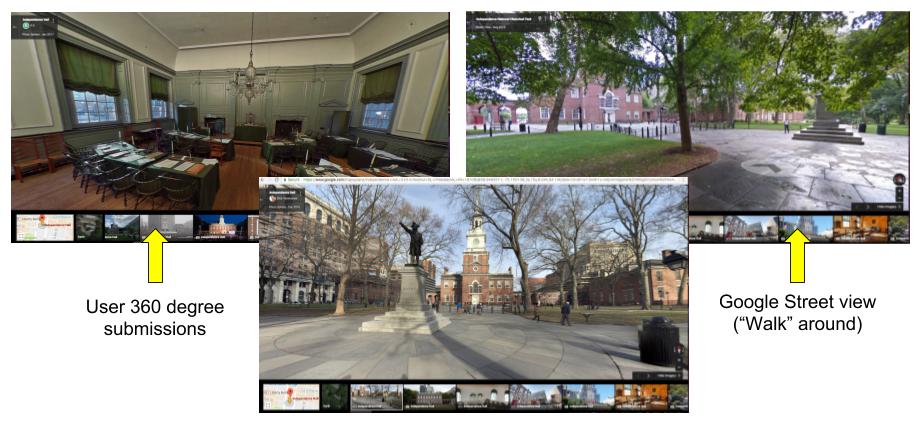
- Some of the tagged locations are uploaded by users. (Also they usually have unblurred faces.)
- Look in the upper left to see who owns it. On the App it may says “Subject to copyright” indicating Google is not the owner.
- Non-Google tagged images are not “walkable” in Street view. (But still fun to explore!) Some of them include inside of buildings rooms you may only see in a tour.
Click to Enlarge Image
-
Closing Comments:
- Check your locations prior to having students go there – Google Maps allows users to upload images. Some images may be personal images of people; others may be protests with signs that may need to be viewed before the presenting it to students.
- This is an excellent way for students to visit places and get a perspective of its location.
- This helps reinforce map reading, latitude and longitude and geographic features
- Some examples of using this in class include creating scavenger hunts (put in coordinates and tell what they see or why this place is important)
You must be logged in to post a comment.