
Maps can be a great way to connect students to different locations both locally and around the world. Google Earth and Google Maps are great options to explore the geography but can also provide an overload of information. Google MyMaps is a nice solution to create focused content using maps without the ability to explore outside of the provided information.
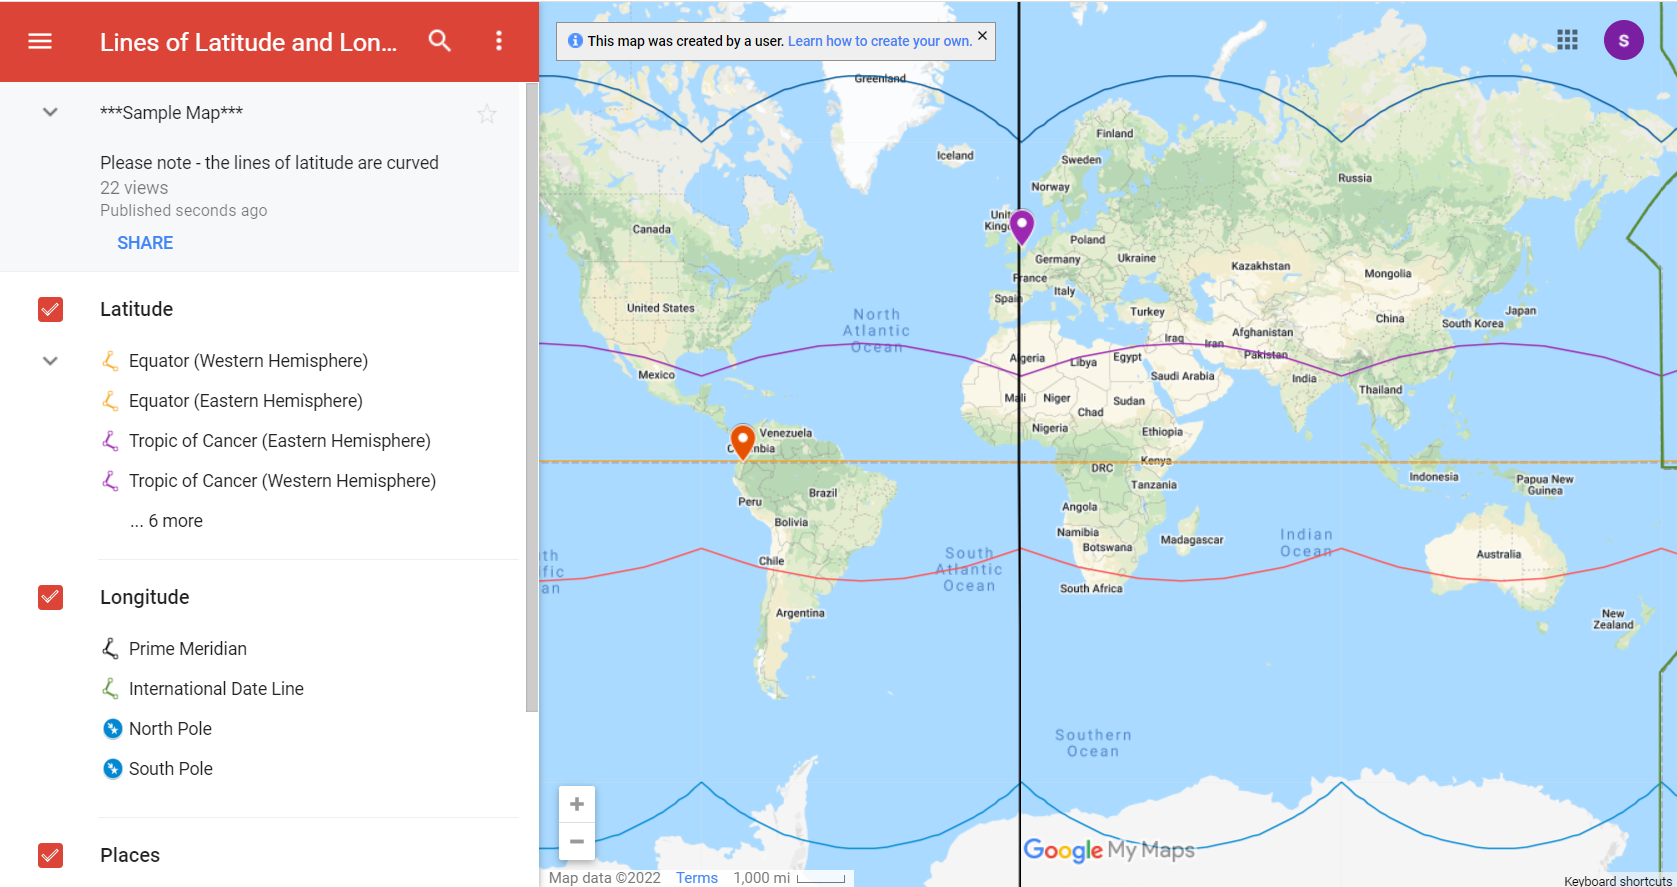
Sample MyMap – Lines of Latitude and Longitude (click to view sample – available to WWCSD only)
With MyMaps, users can:
- Create maps with specific content
- Location placemarkers
- Areas of interest (ex: landform)
- Lines (ex: routes)
- Add information, pictures and videos (videos may not be available for students)
- Create multiple layers to sort information
- Share and present with other users
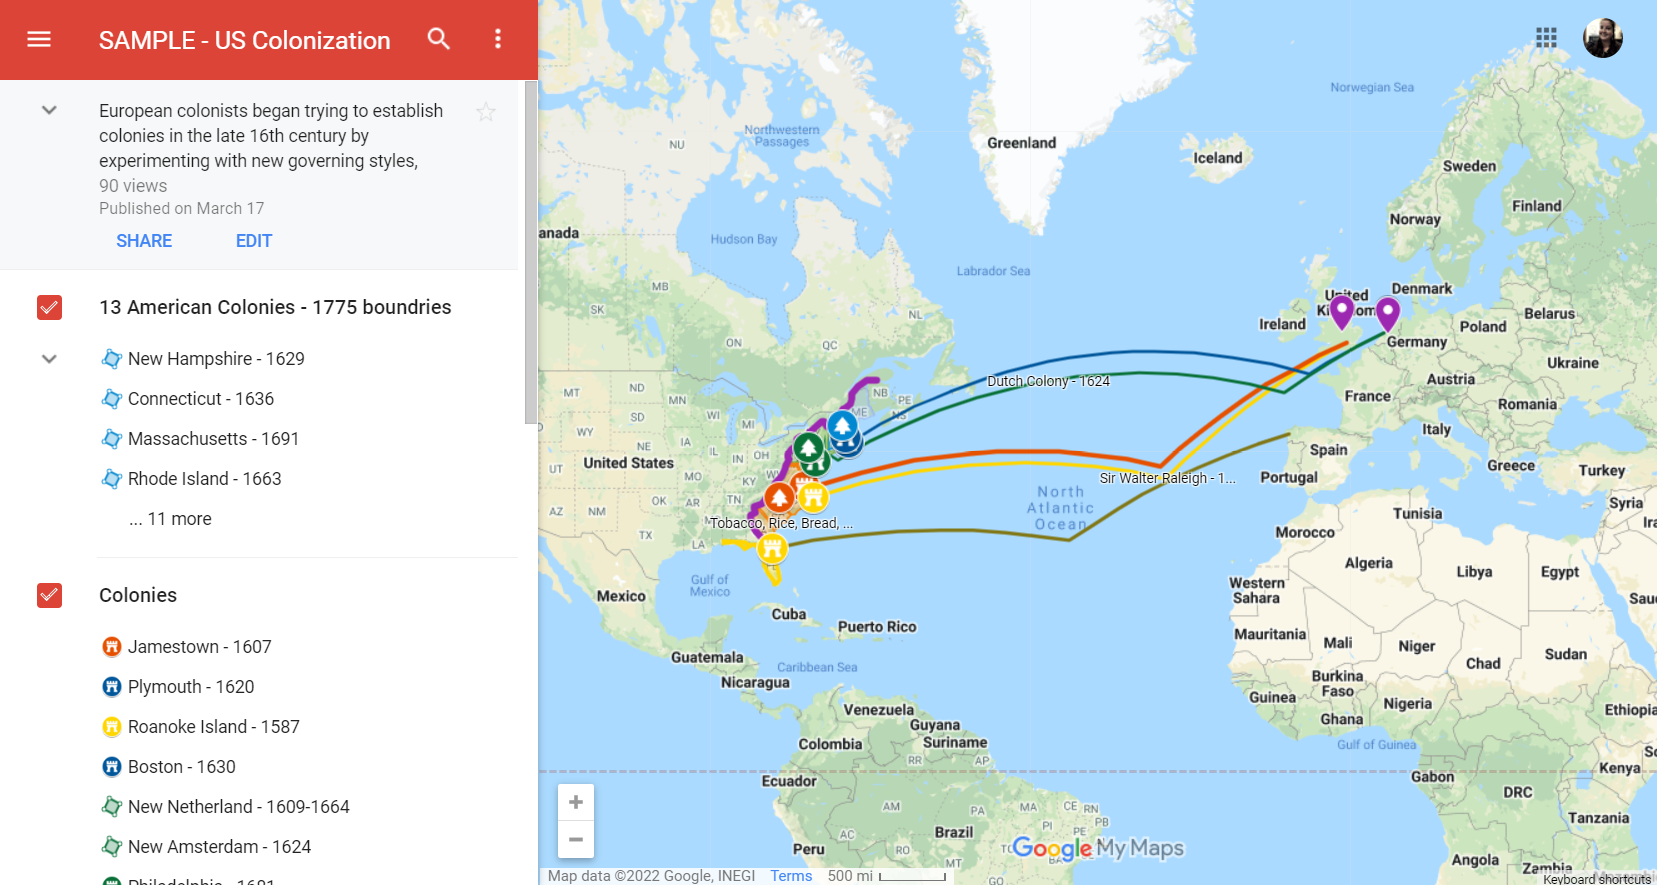
Sample MyMap – US Colonization (Click on the map to view – available to WWCSD only)
Why use this in the classroom?
- Create reusable, focused content on a specific topic
- Students can create “visual notes”
- Overviews of a period of history
- Timeline of a historical figure (or possibly a fictional character)
- Identify similar or different landforms/geographic locations
- Users can collaborate with others to create
- Helps reinforce geography concepts
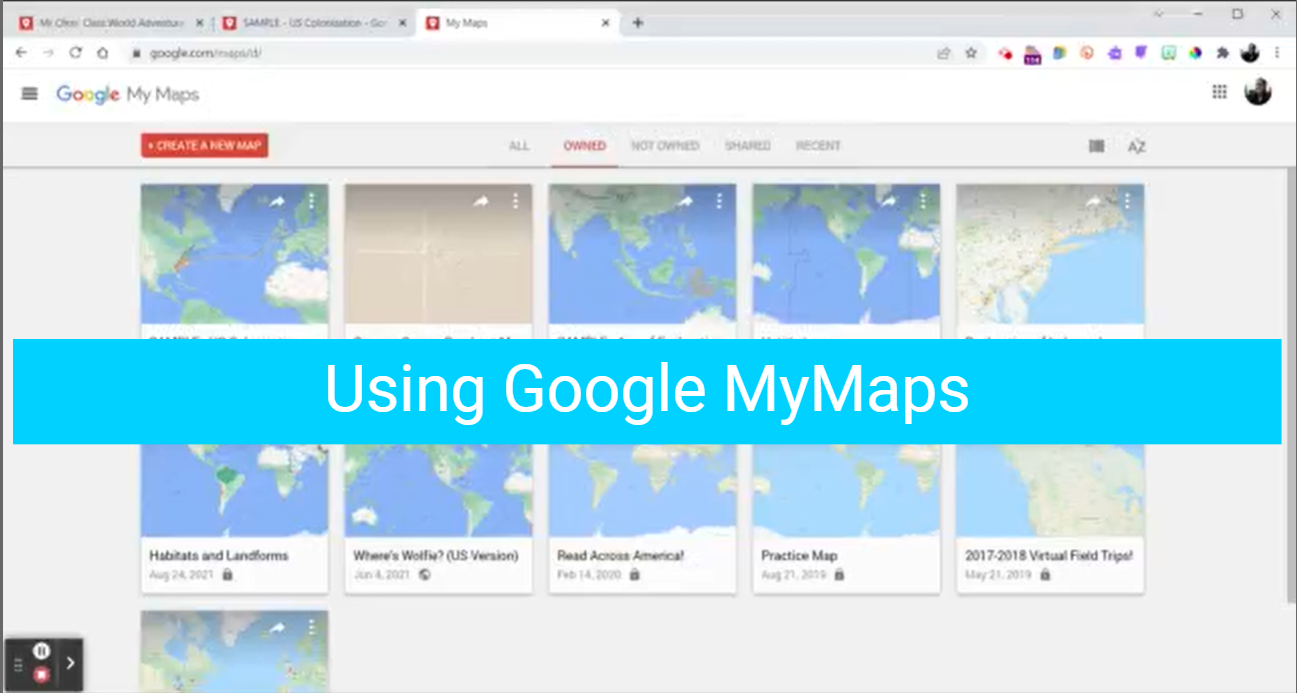
Creating your own Google MyMap:
- Open MyMaps (mymaps.google.com)
- Click “Create a new map” (red button in the upper right)
- Title your map and add a description (upper part of left menu box)
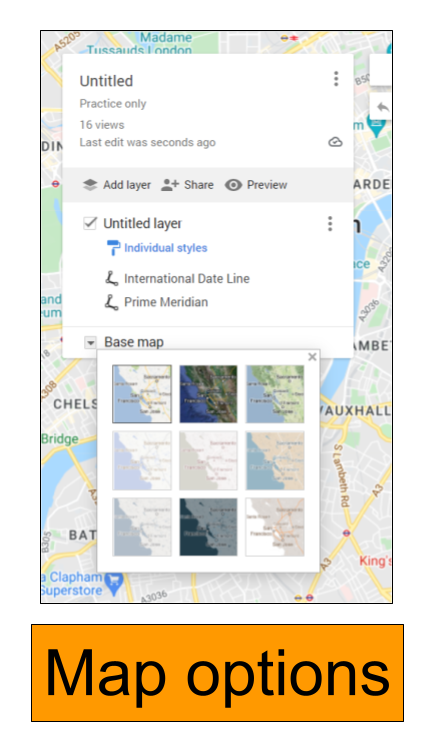
- Adjust the “base map” (How do you want your map to appear?)
- Decide if you want “Layers”
- Layers allow information to be sorted (and turned on/off) depending on the viewer’s preference
- Layers can have consistent labels (uniform style – all the same icon/color) or individual styling
- Notes about adding layers:
- Click on the name to rename the layer (or go to the triple dots for more options)
- When adding points to layers, make sure you have selected the correct layer. (It will have a blue line on the left. This will only appear if you have more than one layer.)
-
Add your points of interest
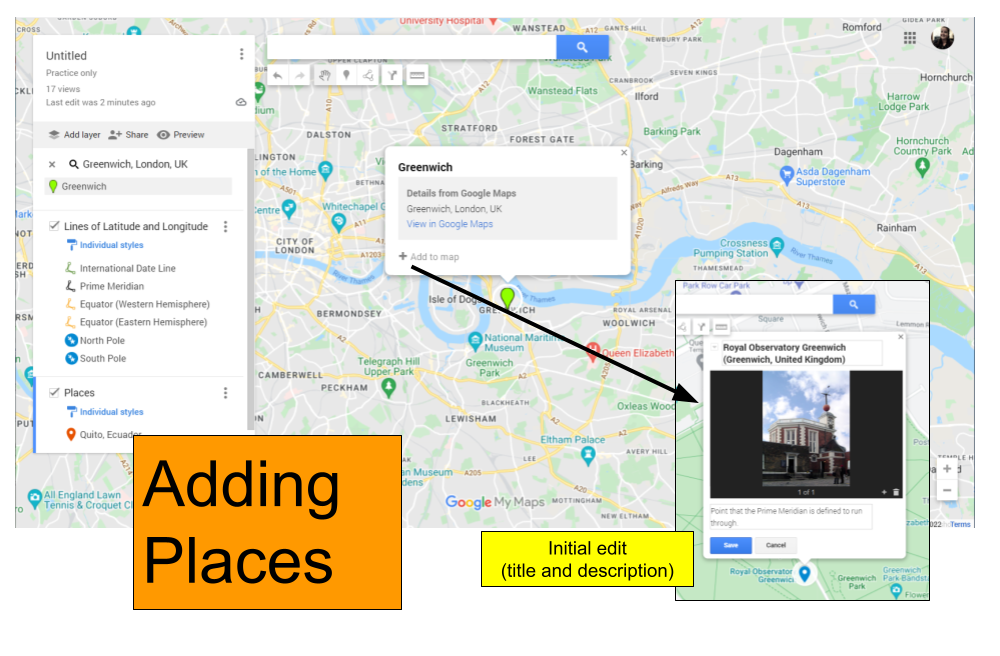
Click to view larger
- Add a placemark (specific location)
- Use the search bar to find a location in Google (and then click +Add to Map when the search popup appears). Once added to the map, you can adjust the placement of the marker.
- Add a placemark anywhere using the Placemark icon (between the hand and line/shape icons). This is good for places that may not be searchable on a map (such as a shipwreck or a place with a personal connection).
- Create a line or shape
- Select the Draw a Line icon. Choose “Add a line or shape”
- Click your starting point and add subsequent points
- For a line – click the end point again after placing it
- For a shape – click the start point to create the shape
- Adjust the line/shape by moving the “white dots”
- Add a placemark (specific location)
-
Add your information to your placemarkers (can also be done when adding a point of interest)
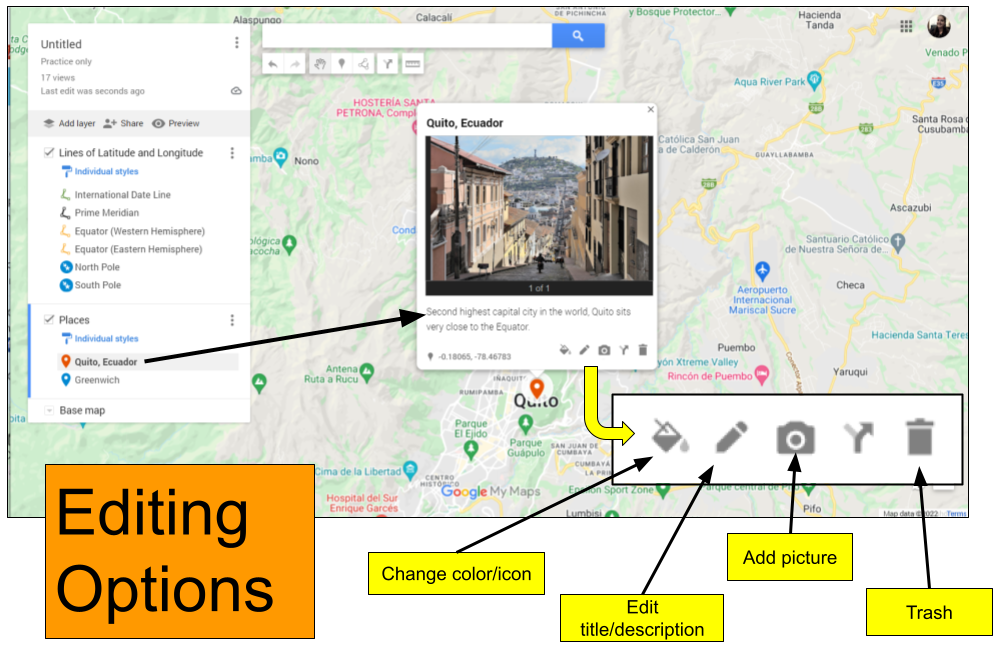
Click to view larger
- Click the placemark/line/shape or the name from the list
- Choose if you want to remove the Google info
- Edit the information
- Paint bucket – change the color and icon
- Pencil – edit the title and information
- Camera – add pictures and/or videos (videos may not be available for students)
- Arrow – driving directions (not necessary for most projects)
- Trash can – remove the point
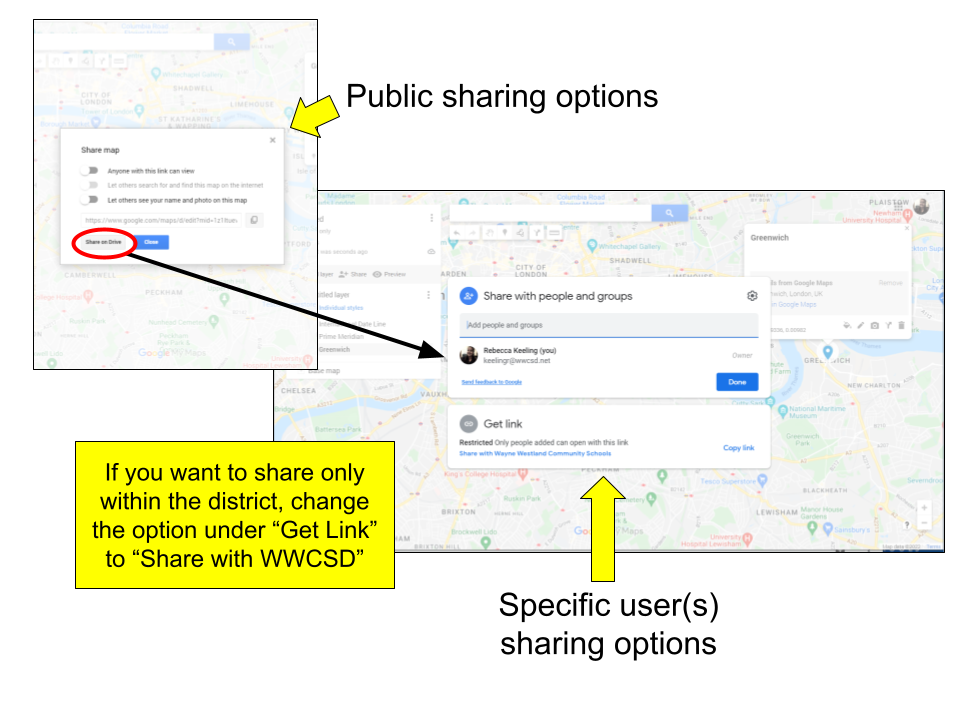
- Share your map
- Toggle on to let “Anyone with the Link” view
- If “Anyone with the Link” is toggled on you can let this map be searchable (this will make it effectively public on the internet)
- Let others see your name and photo (profile icon) on this map – generally I keep this off (especially if public).
- Share on Drive – This is the most secure sharing option (and how you can co-create with someone on a map).
- Share with specific named people (make them editors or viewers)
- Share within the district only (option under the “Get link” section)
Click to view larger
Final Thoughts
MyMaps can be a good option to include maps or map-making in a classroom. As with most things in Google, the maps can be reused and shared. It is worth noting there is not a version history for MyMaps. View our walkthrough video to learn more about creating with Google MyMaps.
***Available to WWCSD staff only***
View our walkthrough about creating and interacting with MyMaps as well as classroom ideas.
You must be logged in to post a comment.