
![]() Flipgrid is a platform that promotes discussion by having students respond with videos. Teachers create Groups (similar to classes) with Topics (assignment posts) that students can respond to with either video or audio. Students can access this from the web or even on mobile devices (phones/tablets) through the app. (Which means they can record themselves almost anywhere!)
Flipgrid is a platform that promotes discussion by having students respond with videos. Teachers create Groups (similar to classes) with Topics (assignment posts) that students can respond to with either video or audio. Students can access this from the web or even on mobile devices (phones/tablets) through the app. (Which means they can record themselves almost anywhere!)
Classroom Ideas:
Students can…
- Demonstrate a concept or skill (ie a how-to video, science concept or an exercise for gym)
- Practice giving presentations and get feedback from their peers
- Converse in a foreign language (possible idea for virtual learning)
- Record music for review (either by teacher, peers or self)
How do I get started with Flipgrid?
First of all, Flipgrid is a free resource which is part of Microsoft. Users can login with their Google credentials (as always it is recommended that you get guardian permission prior to using this in class). Teachers will post a topic for students to respond to; it can be accessed from going to the Flipgrid site or by clicking on a direct link in Google Classroom.
Setup your Group (Class)
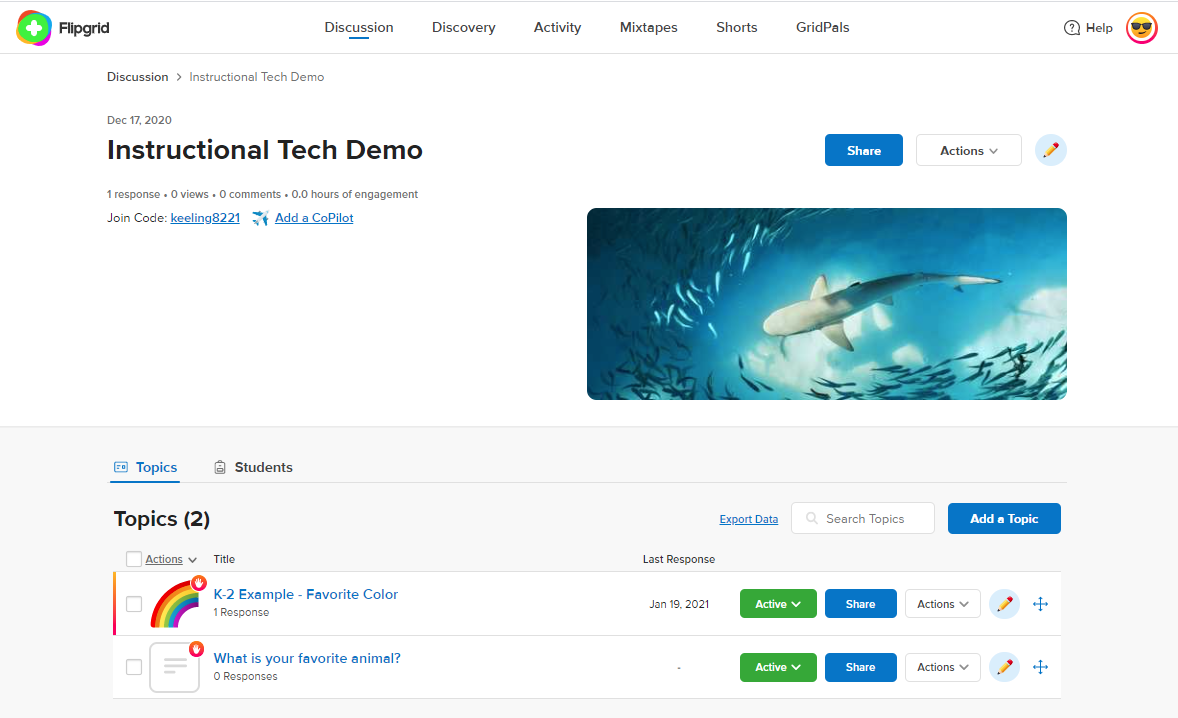
Flipgrid’s Group dashboard -View, edit, or adjust topics here. (Click the pencil icon to edit.)
- Create an account or sign into Flipgrid
- Choose “Create a group”
- Fill in the required information
- Details
- Group name (aka Classroom name)
- Join code – don’t worry about this one if you are using Google Classroom
- Permissions (ie how users will join) – Keep the group private!
- Student Email – add the domain names that are only allowed to join this group (ie wwcsd.net and wwcsd.org)
- *NEW* Google Classroom – alternatively you can import your Google Classroom list
- Features (ie personalize how the Group will look)
- Group Status
- Active – students can view
- Hidden – students cannot view
- Group Status
- Personalize – add an image to the group
- Details
- Create the Group
Once created you will have the option to “add a co-pilot” (co-teacher) for your group. They must have a Flipgrid account to be able to join.
Create a Topic
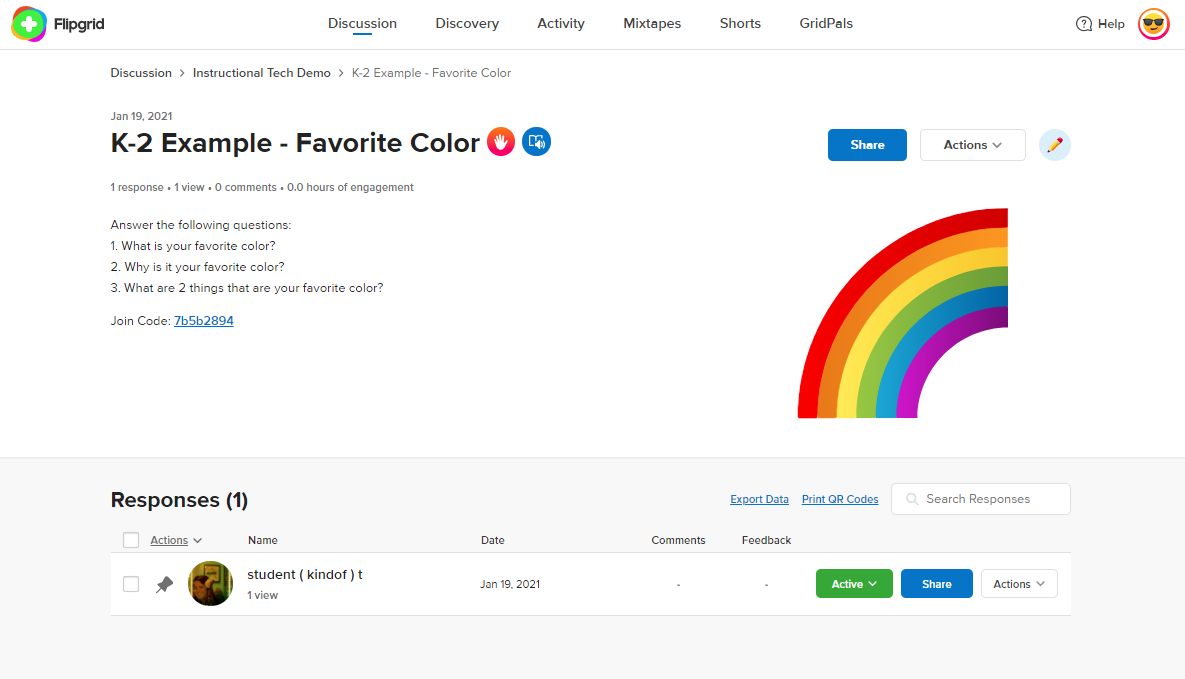
Flipgrid’s Topic Dashboard – From the Group dashboard, click a topic to view responses (listed below). You can change the status, edit, or remove a response from here.
Topics are individual prompts that your students will respond to (similar to assignments in Google Classroom). Teachers can write directions, add media (or videos of themselves), and other information to create their topics. After creating you will have the option to either share the link or post to Google Classroom. If posting to Classroom it will act as a direct link to that topic (recommended for younger students).
Once you start creating the topic, remember you are required to have a title and prompt. The prompt will be where you can put your directions and attach any media (video directions/example, links, picture, etc) that the students need to complete their responses. As a side note: if you have typed directions, Flipgrid already has Microsoft’s Immersion Reader built in to each topic. This allows students to click on an icon to see the prompt directions larger; it will also read the directions aloud to them.
There are other settings you may wish to adjust:
- Essentials
- Topic Moderation – this allows teachers to view videos before they go “live” for the entire group. When viewing responses under the topic you change the status from “Hidden” to “Active” to make it viewable for the entire group.
- Video Comments – do you want students to be able to reply to each other, and if so, how? (text only, video only, or both)
- Record length – what is the time limit of the response?
- Status
- Is this topic viewable to students?
- Active = viewable to the group to interact with
- Frozen = viewable but cannot interact
- Hidden = only the teacher can see
- Schedule – determine when you want the topic to become active and when you want it to close
- Is this topic viewable to students?
- Notifications
- Notification frequency – how often do you want to be emailed when someone posts? You can choose from immediately to daily to even never.
- Topic followers – do you want students to be notified if a new video is posted?
- Video Features – in general when using this with beginners, I recommend turning off or limiting these options until the students are more comfortable using the platform. (ie “less is more”)
- Video and Cover image effects – each video will have a cover image (selfie) and this gives the user an opportunity to add filters, text, stickers, etc to personalize their responses. To start you could leave this option on for the cover picture. It will give the students an opportunity to learn how to use the features without trying to personalize an entire video.
- Video Editing – adjust, crop and rearrange clips of the video
These options can be altered at any time by clicking the edit icon (the pencil) on the topic listing.
Viewing student responses
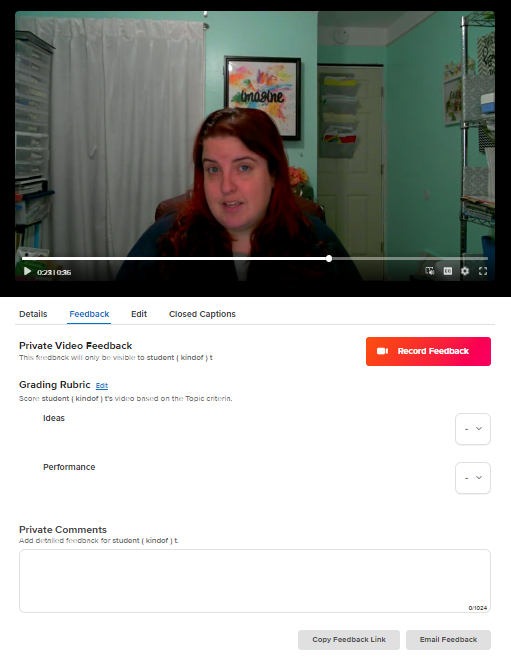
Click on a video to view the response. Choose the feedback tab to give private feedback (pictured).
To view a response, click on the topic. Responses will be listed at the bottom. You will be able to view them, change their status (hidden vs active), or other options under the Actions menu (far right of the response line). This is where you can delete a response if necessary; students cannot delete their own responses – only the teacher can.
You can also provide either a video comment (if enabled) or private feedback to the student. If you make a comment, then the video will appear as part of the thread on that video. Private feedback will appear for the student in their “My Flipgrid” dashboard (my.flipgrid.com). They can see all responses they have created and any feedback associated with it.
How can my students (or myself) create video responses?
Depending on how they access Flipgrid (ie via a topic link or the actual site), students will need to get to their topic that they need to record a response. Once there they will see the title, prompt, and any media associated. There is a red video button at the bottom they can click to start recording their responses. Depending how many options you have enabled will determine how many option the student sees.
The basic format to record a response is as follows:
- Click on the red record button in the topic
- Check the camera and determine what you want to record (students can choose to have video only, audio only, or both)
- Record the video – press pause if they need to stop for a moment, the status bar at the top will tell them how much time they have remaining
- Preview the video – at this point they can delete and re-record if desired
- Take a cover picture (ie “selfie”) that will display for the video
- Add your name and a description
- Submit the video
Once submitted students will have the opportunity to view any active videos and respond to them (if the option is enabled). If the teacher gives private feedback they can view that as well on their My Flipgrid Dashboard.
You must be logged in to post a comment.