
Google Earth is a 3D map tool that can help bring geography into the classroom. It offers learners a chance to explore the globe’s different locations through maps and voyages (often curated content by experts and organizations). Users can also create their own projects (similar to the voyages) and share their projects with other.
The Basics
Google Earth is similar to Google Maps but expanded with 3D presentation views. It has the capability to integrate different user photo spheres (360° images) as well can demonstrate some of the topography in explorable 3D vs a flat map.
While this will not affect all devices, it is worth noting that Google Earth may be slower on WiFi depending on your connection. (You may notice lagging or interruptions.) If you notice this, try checking if your WiFi signal is strong.
Why use this in the classroom?
- Explore locations not easily accessible – take users inside a volcano such as Mauna Loa or explore the ocean underwater in the Great Barrier Reef
- Visit historical landmarks (some of them you can even virtually tour) – examples include Machu Picchu in Peru; the White House in Washington, DC; the Valley of the Kings in Egypt; or Angkor Wat in Cambodia
- See different perspectives (instead of seeing a photo or diagram, view places in 3D) – examples to explore include Mt. Everest in Asia; Eiffel Tower in France; or the Grand Canyon in Arizona
- Tour museums – Shedd Aquarium in Chicago, Illinois; Royal Tyrell Museum (Dinosaurs) in Canada, or the Smithsonian National Air and Space Museum in Washington, DC
How to use Google Earth
Main (Left) menu controls
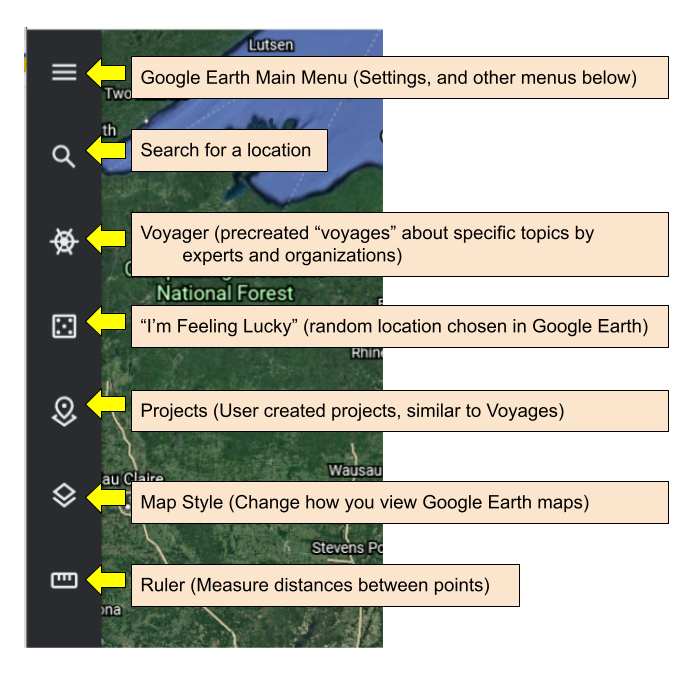
- Magnifying Glass – Use the magnifying glass icon (in the left toolbar) to search and explore different places
- Search by exact name*, absolute location (latitude/longitude), or general search
- It will direct you to the “closest” match to what you type
- Ship’s Wheel (Voyager) – explore expert and museum curated “tours” on particular topics
- Topics vary and may change
- Tours are grouped by topic (under the main image carousel)
- Dice (“I’m feeling lucky”) – sends you to a random location to explore
- Place marker (Google Earth projects) – Create your own projects in Google Earth (see our post about creating projects)
- Layers (Map Style) – this will allow you to adjust what you see on the map. Adjust 3D buildings, boundaries, or even add animated clouds (from the last 24 hours) to your view.
- Ruler – measure distance and area. This can be useful when comparing relationships between two locations. It allows users to measure distance using multiple points. It will also calculate the area and perimeter of a specific area.
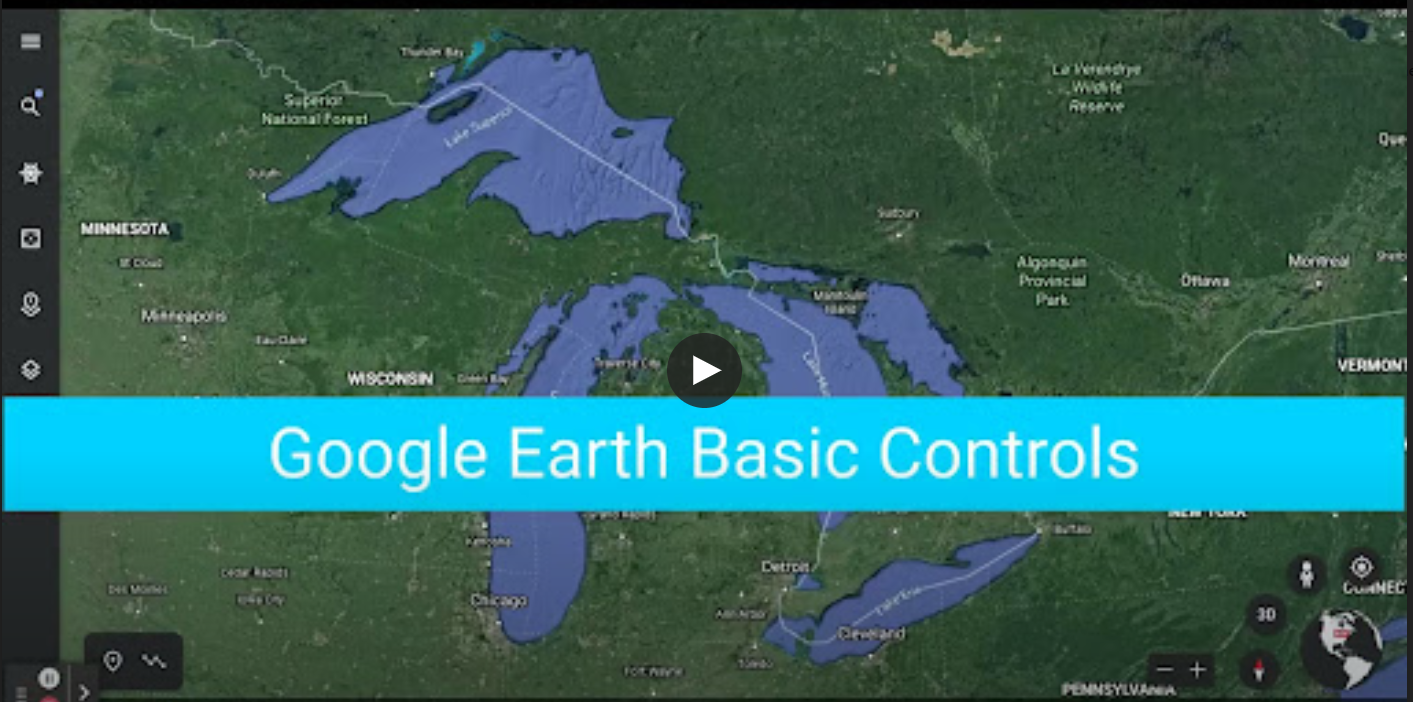
Google Earth Basic Controls tutorial (Available to WWCSD staff only)
Navigation Controls (lower right)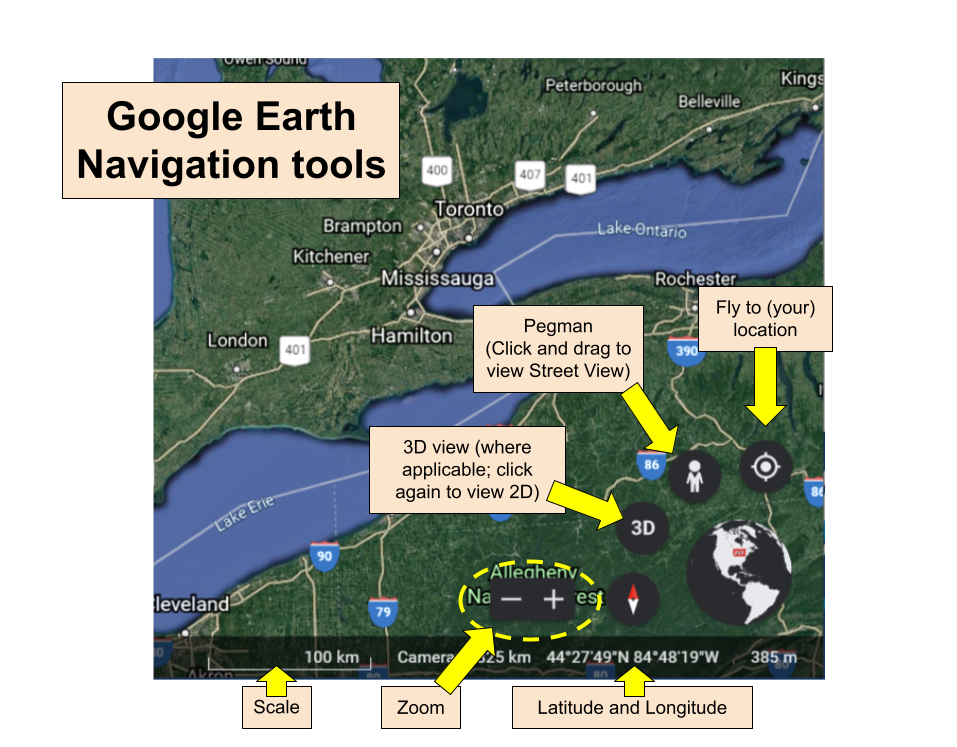
- + and – buttons – Zoom in and out of a location
- Compass – the red arrow will point north; clicking it will reorient your view north
- 3D (2D) – changes the view to include 3D or 2D features
- Pegman (Person icon) – Drop him in different locations to view street view images and static photospheres
- Target – Fly to your registered device location. As in where Google registers your device’s location in real time.
Recommended tips:
Generally speaking, Google Earth can be easy to start interacting with. To get the most out of it, there are a few shortcuts that may make exploring easier:
- Click/Hold + Drag: “rotates” your view from the point you chose
- Shift + Click/Hold + Drag: changes horizon perspective. Generally you are viewing places directly above them; this allows you to change the perspective to almost street level. (Highly recommended in areas with the 3D landscape rendering.)
- Utilize Street View thoughtfully – Drag + Drop Pegman (the yellow man icon) onto any blue highlighted area to explore street view images
- “Dots” tend to be photo spheres uploaded by Google users (not Google). User uploaded images will show bystander faces; Google will blur them. While usually student appropriate, user uploaded images are recommended to be viewed before sharing with your class.
- “Lines” tend to be “walkable” images uploaded by Google and have bystander identification blurred. There are occasional user uploaded explorable images. You can view the author by looking at the name in the bottom left.
-
Explore Voyager – Voyager offers different collections already curated by different experts and organizations. These can be a great way to introduce different content or provide a way to explore more.
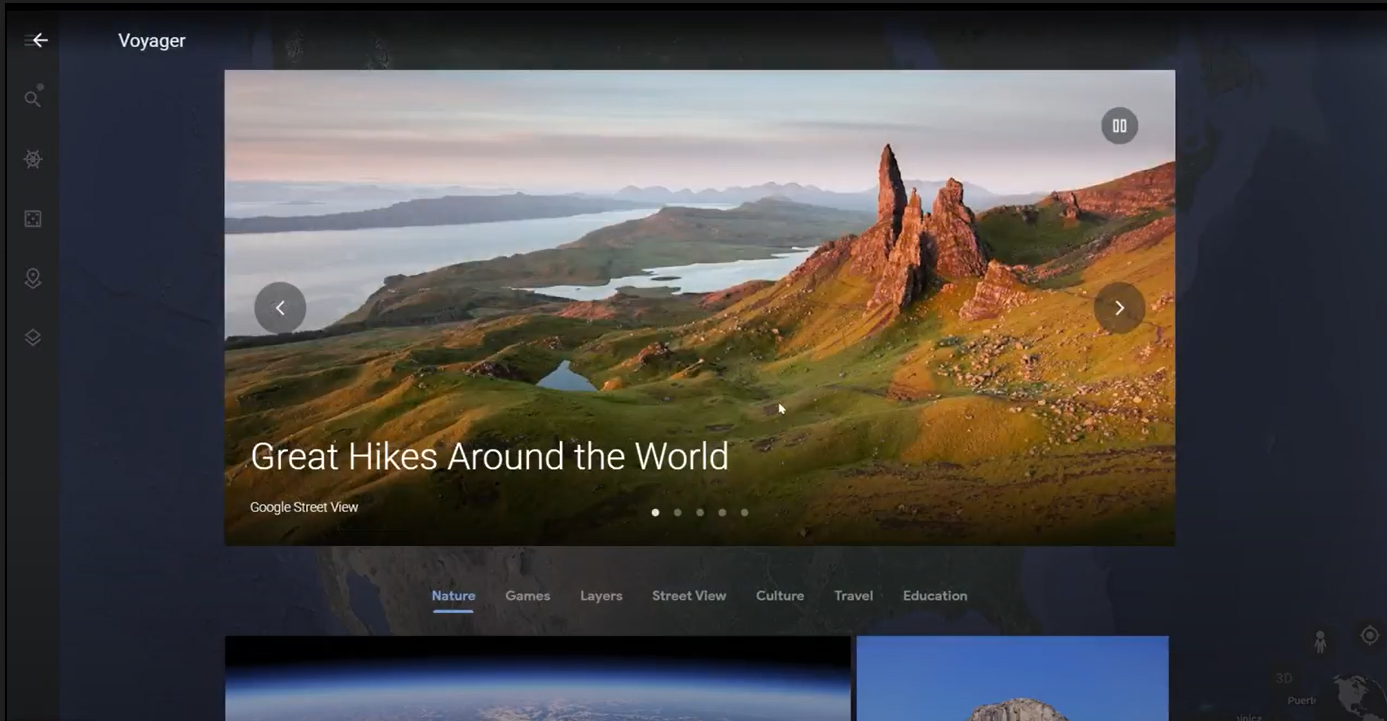
View our Voyager overview video
- Search by category – beneath the initial featured voyages, click on the categories to view specific tours
- Always preview tours – while generally academic in nature, it is advised to view tours to make sure they are appropriate for your students
- Make sure all Youtube videos are approved if allowing students to explore at your own pace. In our district you need to open the video in Youtube and then make sure it is designated as “viewable for wwcsd.net” before students can watch it.
You must be logged in to post a comment.